Imagine if you could create an orthographic drawing from a 3D model in 20 seconds? Well -- thanks to BricsCAD's ViewBase command -- now you can!
The ViewBase command generates associative orthographic and isometric views of 3D models in paper space layouts. It works on BricsCAD Pro licenses and higher.
Create orthographic drawing views from a 3D model in 20 seconds!
How to create orthographic drawing views in BricsCAD in 20 seconds
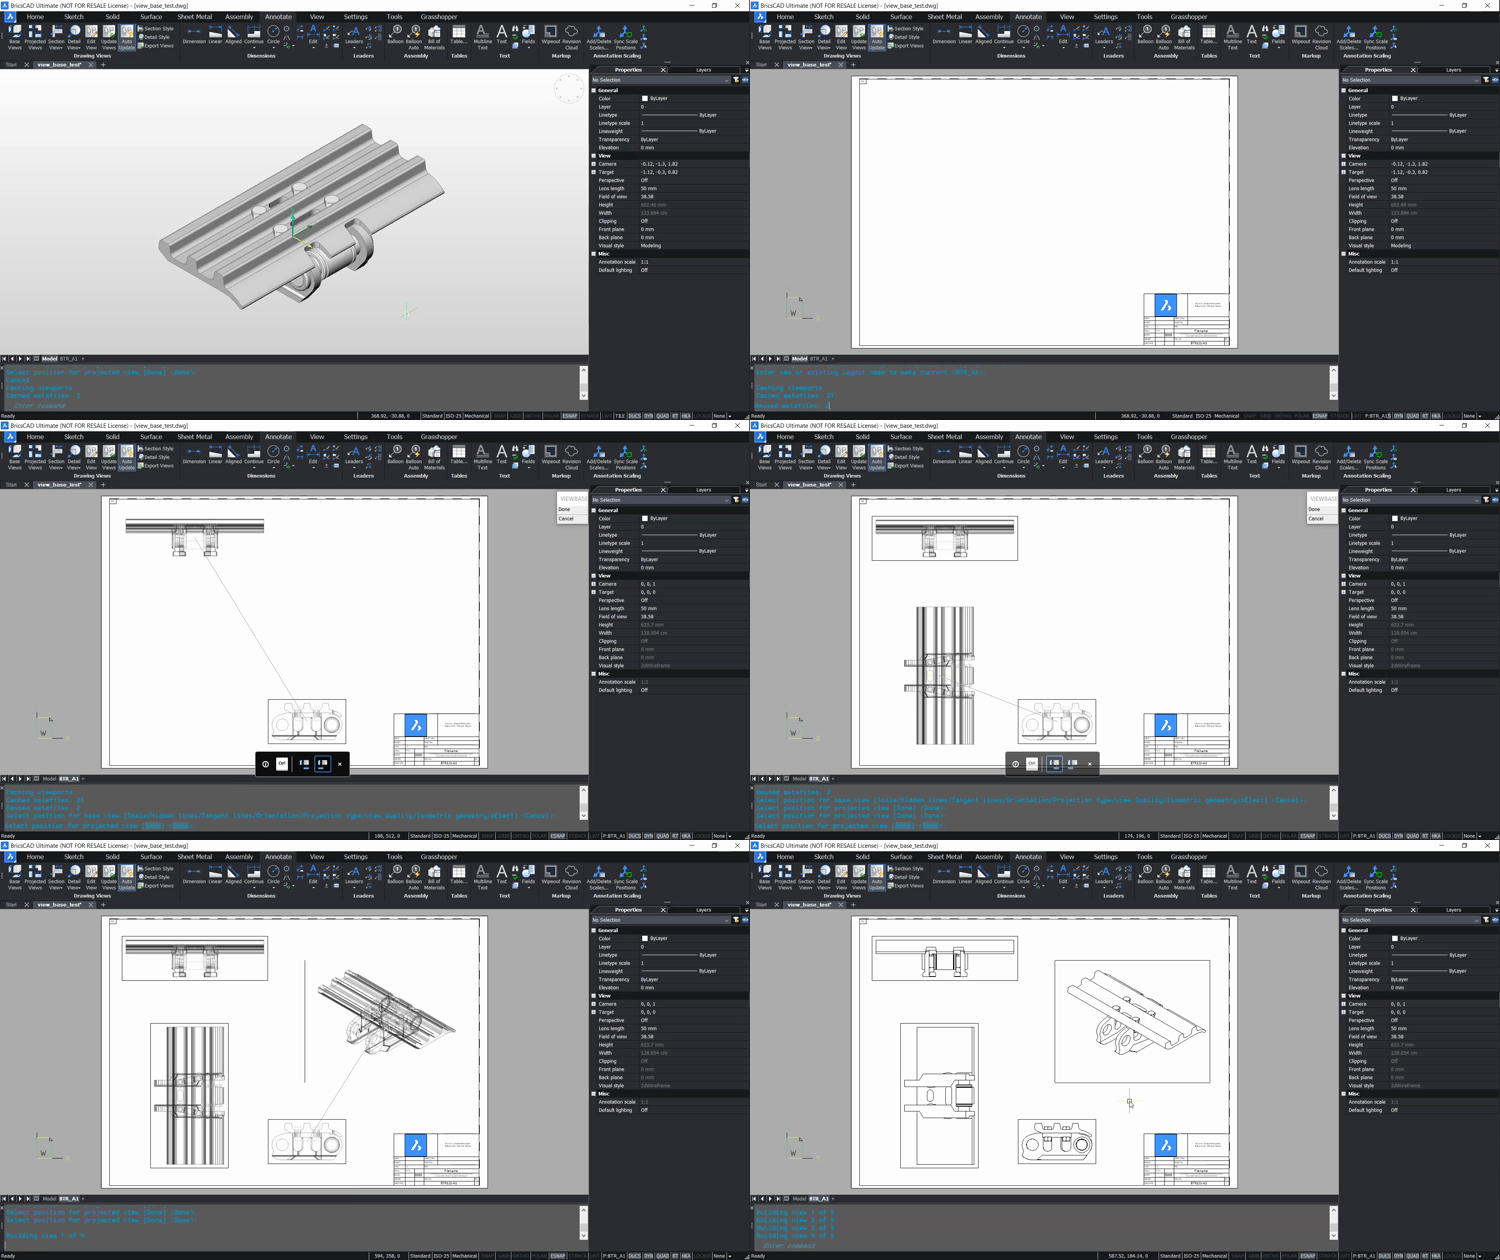
- Launch the ViewBase command and select either the entire model or just a selection. (If you have created exploded views of assemblies or unfolded views of sheet metal parts, you can also export these by selecting "SpecialViews".)
- Select a layout to create the views on or enter a name into the command line to create a new one.
- Left-click in the paper space to set the view.
- Move the mouse around to generate additional views.
Note Hit Ctrl to reorientate these views to break the relation to the base (or parent) view and move the projected view freely. - Left-click in the paper space to set the view.
- Repeat steps 4-5 until all drawing views have been set.
- Hit Enter to finish the command.
Options
Before you insert the view(s) into the paper space you have several options:
Set the scale: fit in a set number of views, choose from a selection preset scales or customize your own scale.
Hidden Lines: toggle on or off.
Tangent Lines: toggle on or off tangent edges between tangent faces.
Visible tangent edges are created on the BM_Tangent_Visible layer. Hidden tangent edges are created on the BM_Tangent_Hidden layer.
Note: Tangent edges are always created for isometric views. Freeze or switch off the display of the BM_Tangent_Visible layer to hide tangent edges in isometric views.

Left: Hidden lines and Tangent lines switched off. Middle: Tangent lines switched on. Right: Hidden lines switched on.
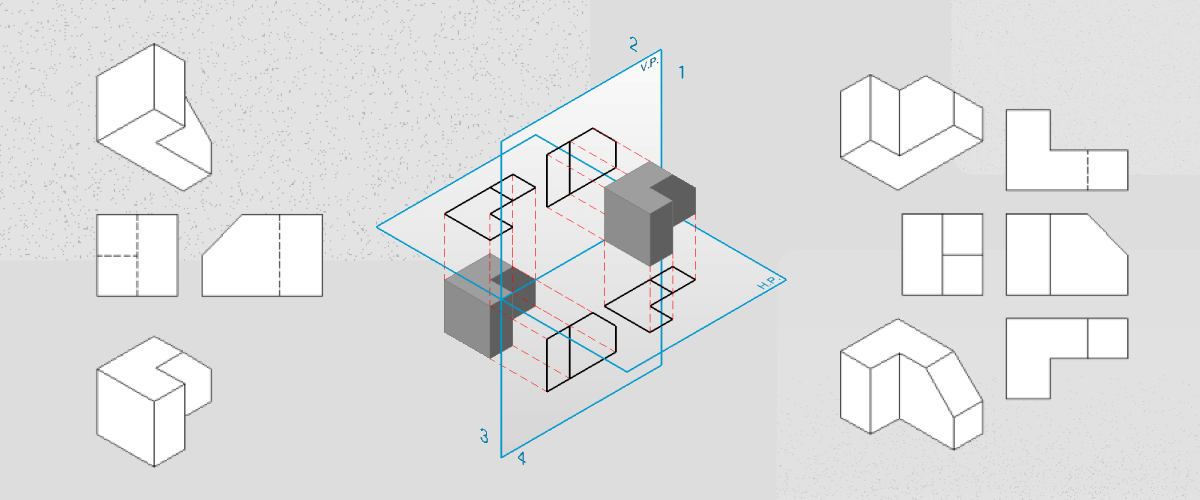
Orientation: Defines the base view. the angle of view, left, right, top, current workspace view, etc. Rotates the 3D model so that the main view is projected on the vertical projection plane (V.P.).
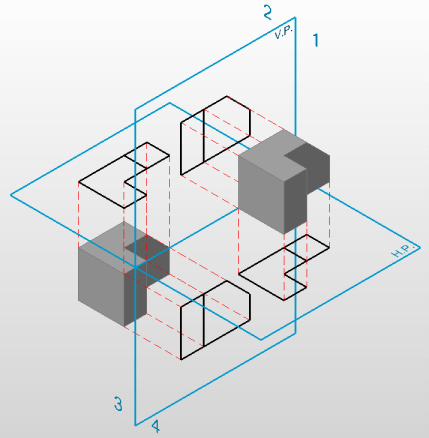
Projected views.
Projection type:
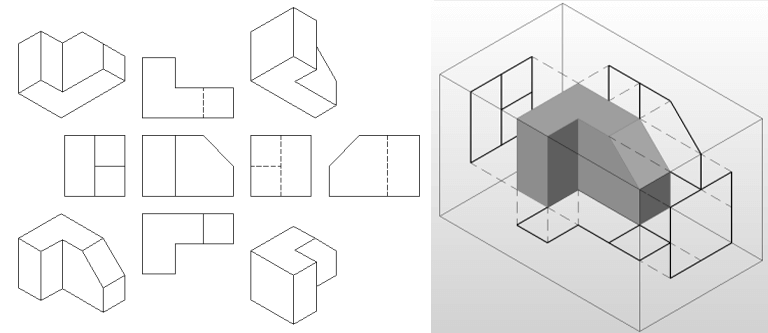
First angle -- aka. European projection:

Example of "first angle" European style projection.
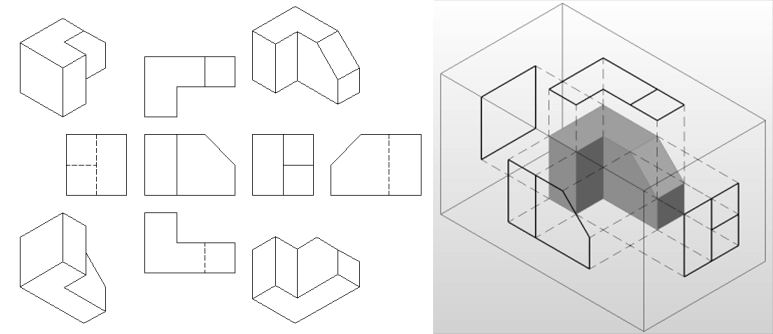
Third angle -- aka. American projection:

Example of "third angle" American style projection.
Note: The default projection type depends on the value of the MEASUREMENT variable:
- 0 -- (Imperial) generates the third angle projection
- 1 -- (Metric) generates the first angle projection
View Quality: The quality of the drawing created.
Isometric Geometry: Defines the style for the isometric views: rendered 3D view or 2D drawing.
Note: use "3D views" to change the* Visual style *with the Properties panel afterward.
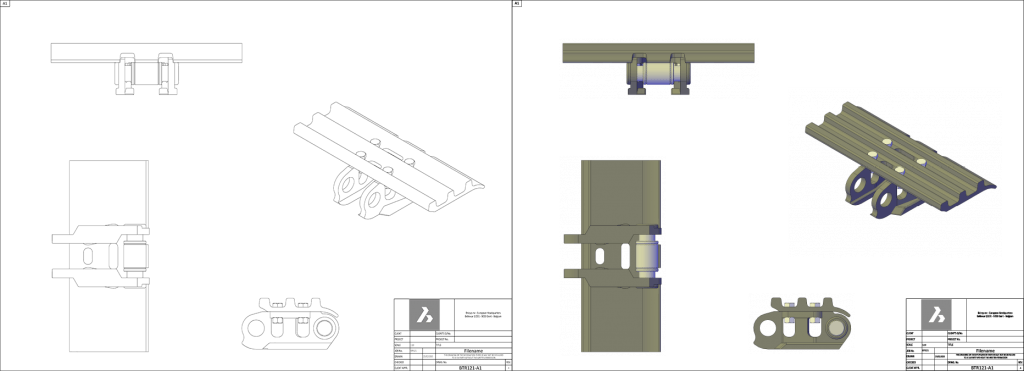
Left: 2D geometry, without tangent or hidden line. Right: 3D geometry style with Conceptual view style.
Edit the drawing views
Once generated you can move, rotate and reposition the drawing views, just like any other CAD entity.
Use the Properties panel to change the properties of the drawing views. For example, turn hidden lines on and off, or change the Visual style.
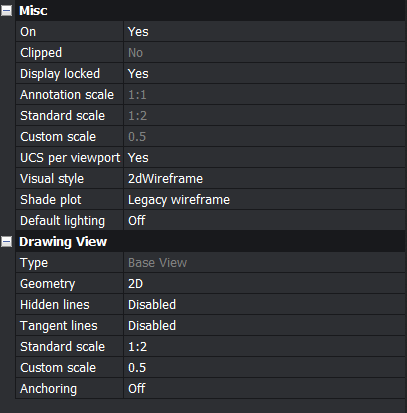
Properties for drawing views.
Note: To change the Visual style, you must first change the geometry to "3D" or "Draft". You will not be able to change the visual style if the Geometry style is set to "2D". You change the geometry when you create the drawing view or after with Properties panel.
We recommend that you switch on GENERATEASSOCVIEWS before you create views.
To turn off the drafting viewports (those 'ugly' black boxes) simply freeze the Drafting Viewports layer.
Add annotations
When you're finished, you can add measurements, section views, callouts and any number of annotations you desire to these drawing views.
Note: BmBalloon only works on drawing views where the geometry is set to 2D (see the Properties Panel). To place annotations and balloons turn GENERATEASSOCVIEWS on. This means that drawing views are associated with the original model.
If drawing views were generated before GENERATEASSOCVIEWS was turned on -- they are non-associative the view will update with the model, but dimensions will not!
Learn more
Find out more about the BaseView Command in the Bricsys Help Center.
Download BricsCAD free for 30-days
Transform 2D entities with BricsCAD®
Permanent or subscription licenses that work in all languages, in all regions.
More Tuesday Tips:
- BricsCAD Trial Versions
- Glossary of CAD terms
- Reduce your work time with The Quad
- Save time with Propagate
- Edit polylines in BricsCAD
- Converting to .dwg
- BIMTags
- 11 -- ways to draw a square in BricsCAD
- A quick guide to DXF
- Solids, Surfaces, and Meshes
- Sweep
- Callouts, leader lines & balloons
- Automate Technical Drawing
- Orthographic Drawing from a 3D Model in 20 Seconds
- 'api-ms-win-crt-runtime-dll' Error while starting BricsCAD
- Everything you need to know about Render Materials in BricsCAD
- Transform 2D Entities with Stretch
- Move, Edit and Change Entities at Hyper Speed with BricsCAD
- The BricsCAD® Hotkey Assistant & Tips Panel
Explore BricsCAD
Download BricsCAD Free Trial | Sign Up For News & Updates | Shop Online For BricsCAD Desktop Software
