Search

3D ModellingBIM

2D, 3D, BIM - 9: The House P2 - The Roof

By Rose Barfield 4 min June 6, 2019
header_roof.jpg

Last time we looked at how to use some of the tools used to create walls, slabs (floors) and simple flat rooves. This time I'm going to show you another way of making a flat roof and one method to create a pitched roof. There are still many, many ways of working with BricsCAD BIM, but this should give you a good starting point.

New Commands covered this time:

This time we will focus on new techniques for commands you already know.

Watch video on YouTube

Flat Roof

I created a flat roof by extruding some of the existing walls, tidying up the join and extruding a floor.

How to do this:

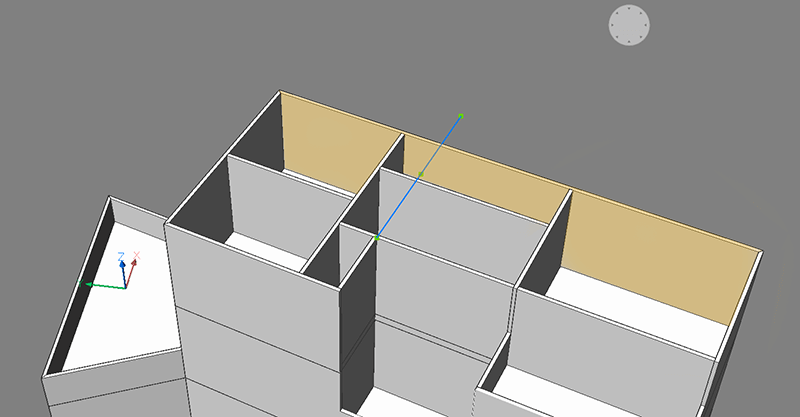
  1. Draw a line across the top.
  2. IMPRINT the line on the top face of the far wall shown (yellow). Delete the source object?: yes.2D, 3D, BIM - 9 The House P2 - The Roof- 1 line orange
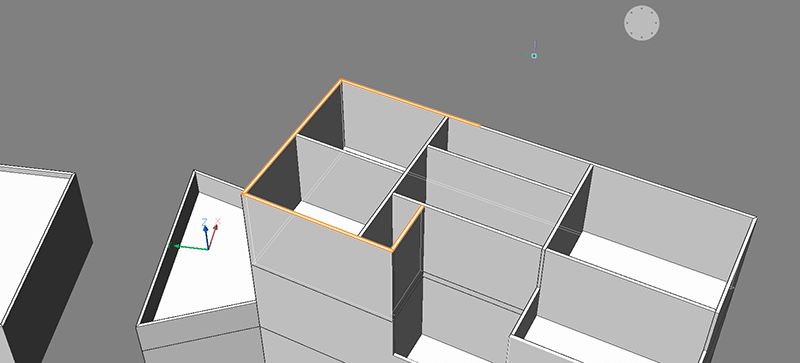
  3. Select the top surfaces shown (orange).2D, 3D, BIM - 9 The House P2 - The Roof- 2 select
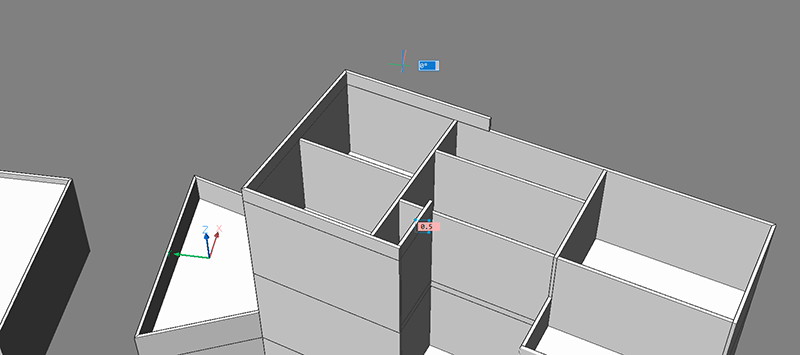
  4. EXTRUDE up.2D, 3D, BIM - 9 The House P2 - The Roof- 3 extrude-1
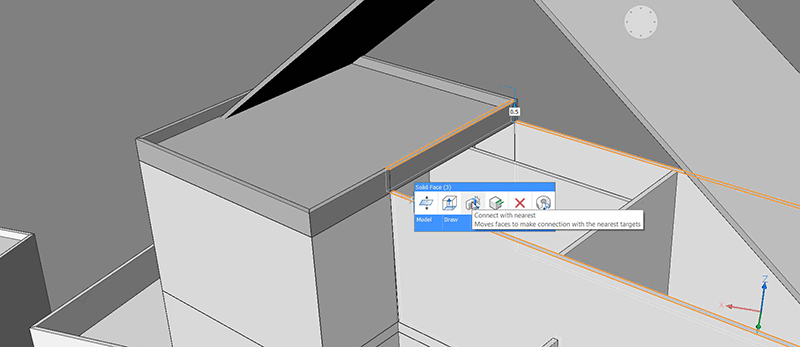
  5. Use TCONNECT -- 'Connect to nearest' to close the gap.
    Note: If you are not sure how to do this, check Part 1.2D, 3D, BIM - 9 The House P2 - The Roof- 4 connecttonearest
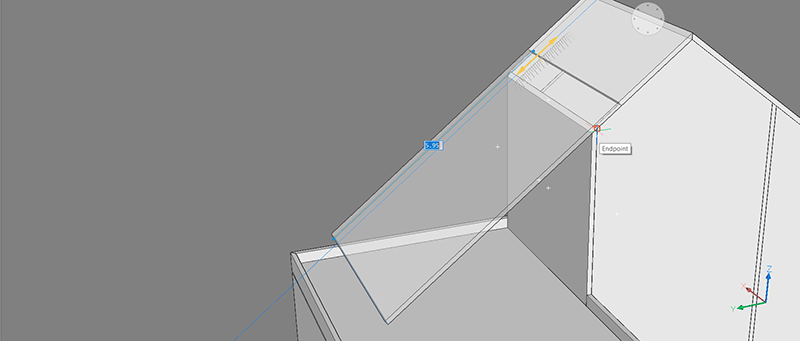
  6. Draw a RECTANGLE in the gap.
    Note: Use DUCS to align the rectangle with the top face of the lower layer walls.2D, 3D, BIM - 9 The House P2 - The Roof- 6 polyline
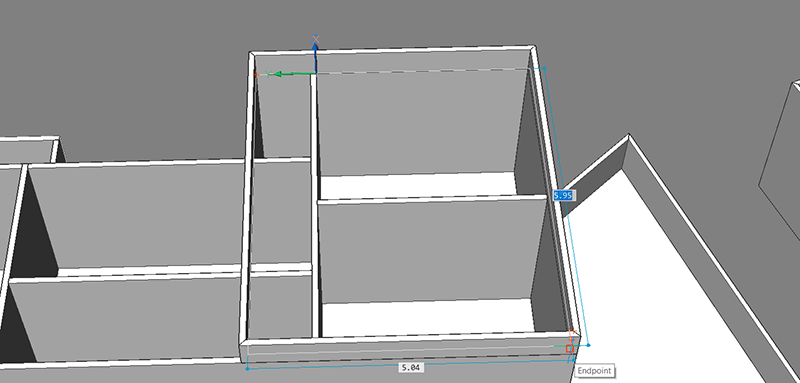
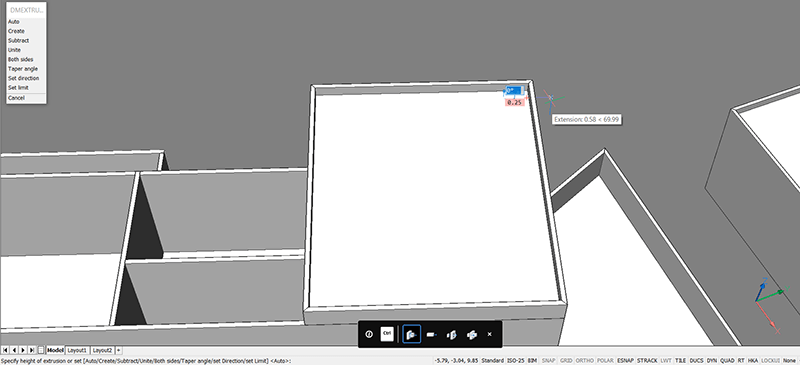
  7. EXTRUDE the rectangle up to create a flat roof.2D, 3D, BIM - 9 The House P2 - The Roof- 7 extrude

Sloped Roof

I used a polysolid to create a base for my roof, edited it and then connected the exterior and interior walls to the roof.

How to do this:

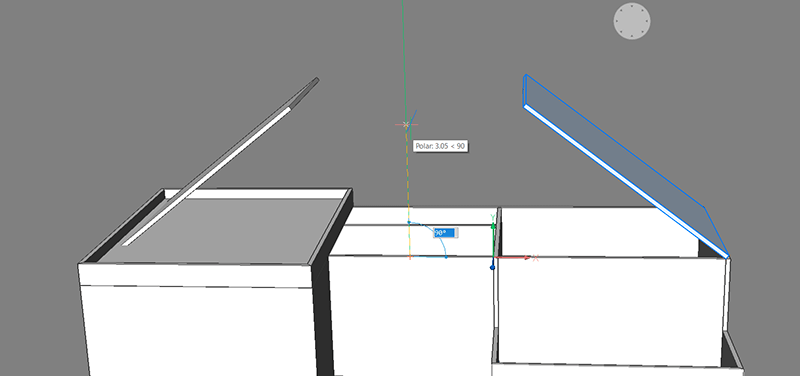
  1. Use POLYSOLID to draw a roof.
    Note: Hit Shift to change the UCS.2D, 3D, BIM - 9 The House P2 - The Roof- 9 polysolid
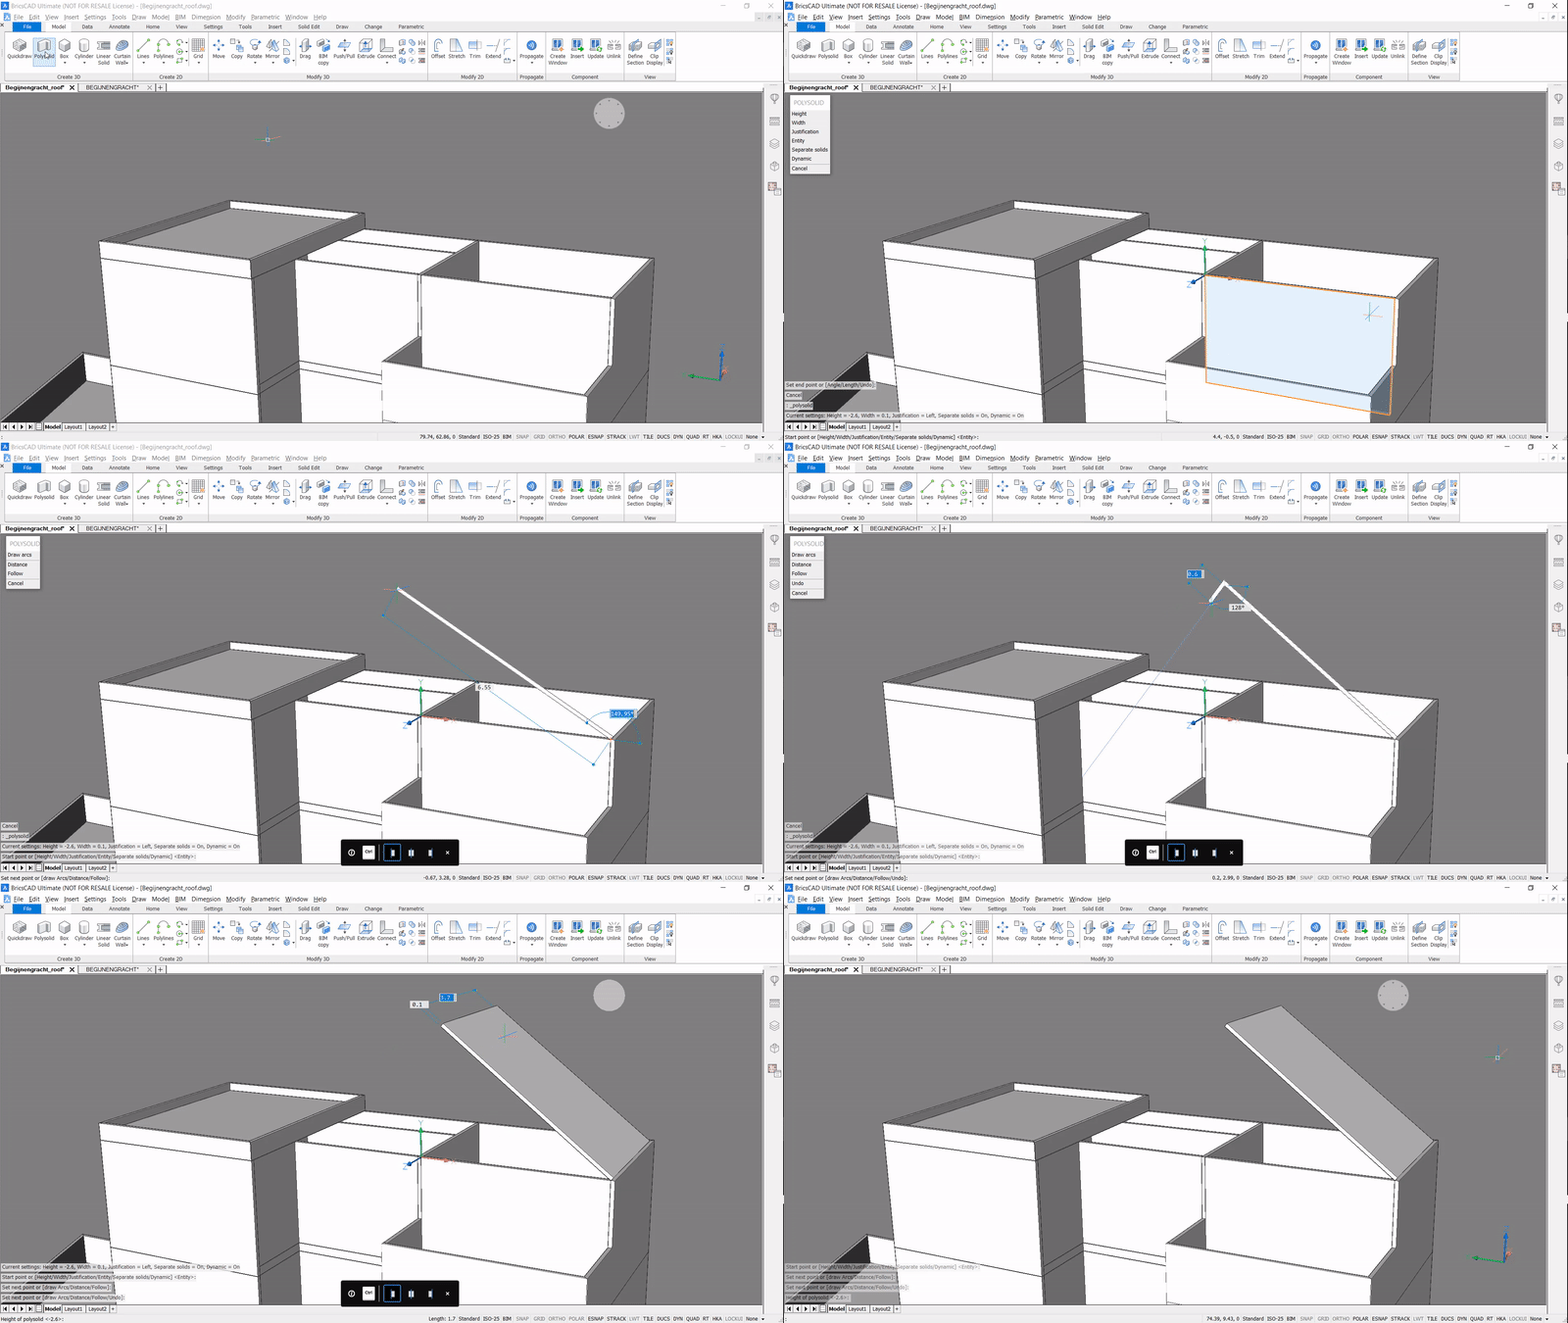
  2. MIRROR the roof.2D, 3D, BIM - 9 The House P2 - The Roof- 10 mirror
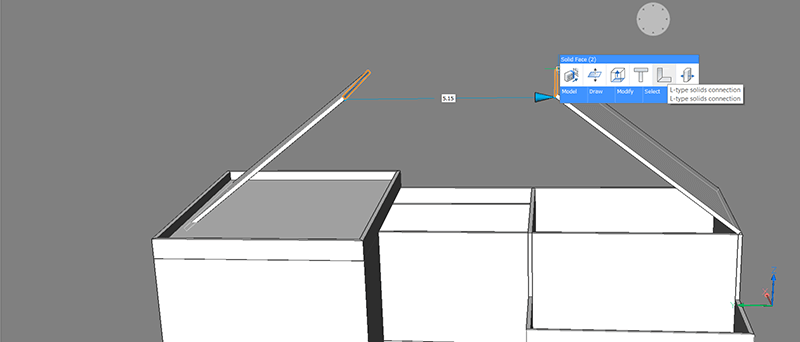
  3. Use LCONNECT to join the solids.2D, 3D, BIM - 9 The House P2 - The Roof- 11 lconnect
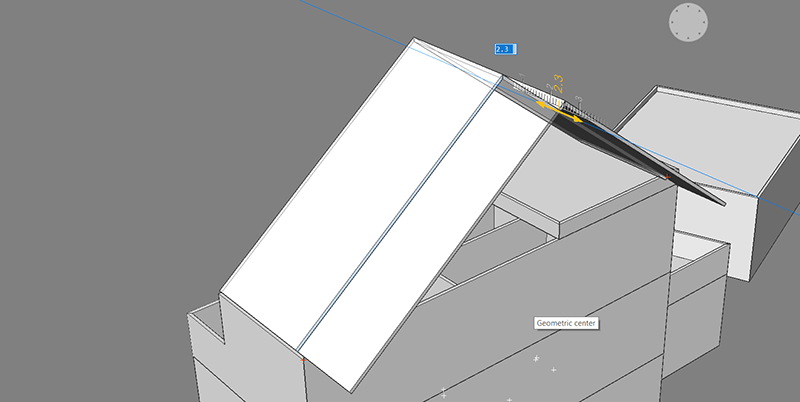
  4. Use PUSHPULL to set the correct overhang.2D, 3D, BIM - 9 The House P2 - The Roof- 9.5 pushpull
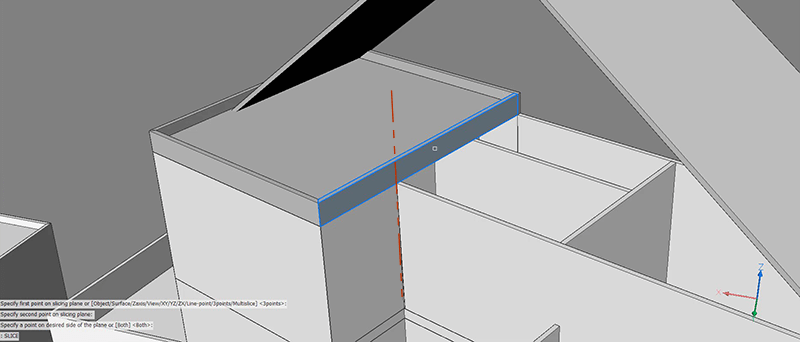
  5. SLICE the walls shown (blue).
    Note: If you are not sure how to do this, check part 5.2D, 3D, BIM - 9 The House P2 - The Roof- slice 1-copy
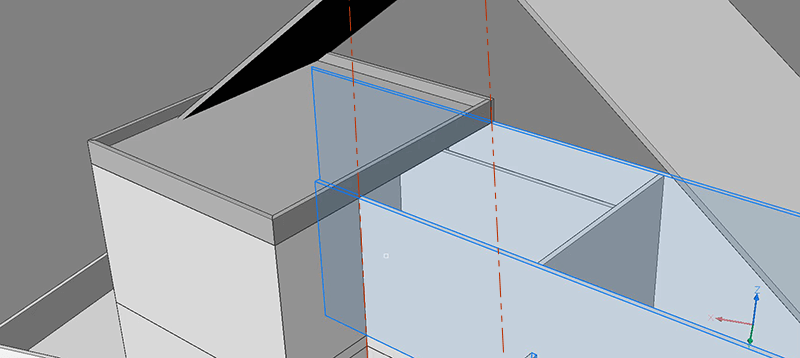
  6. Repeat2D, 3D, BIM - 9 The House P2 - The Roof- slice 2-copy
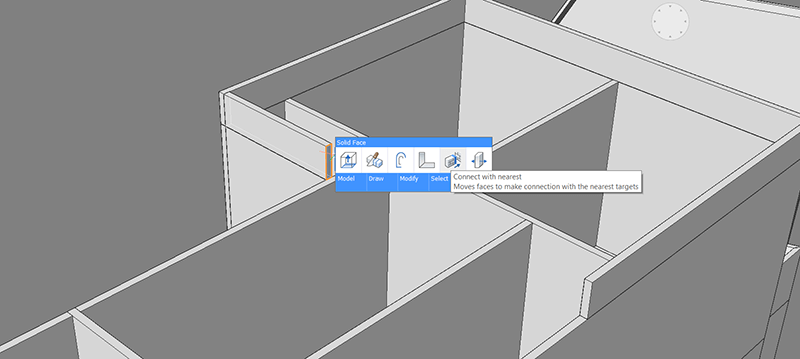
  7. Select the top faces of the wall solids (orange).
  8. Connect to Nearest.2D, 3D, BIM - 9 The House P2 - The Roof- conect to nearest
  9. Shorten the overhang of the roof with PUSHPULL.2D, 3D, BIM - 9 The House P2 - The Roof- 15 pushpull
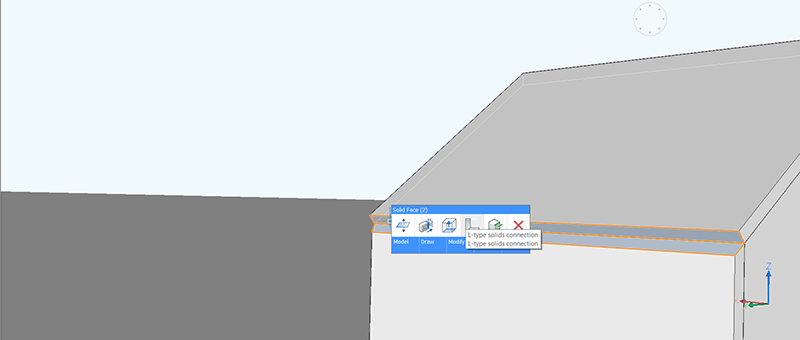
  10. LCONNECT to tidy the join.2D, 3D, BIM - 9 The House P2 - The Roof- 16 lconnect

Finishing up

Use BIMCLASSIFY to assign the appropriate BIM information to the newly created roof: 'BIM Roof'. If you can't remember how, check part 8.

2D, 3D, BIM - 9 The House P2 - The Roof- FINAL2

Next Time

Now it's taking shape! Now the building has a roof. Join us next time when we look at how to windows and doors using BricsCAD BIM.

Don't have BricsCAD yet?

Easy to try, easy to buy, easy to own. That's BricsCAD. Try all of our products, for free for 30 days at www.bricsys.com. Freedom of choice, plus perpetual (permanent) product licenses that work with all languages, in all places. You'll love what we've built for you with BricsCAD.

Keep Reading

  1. Moving from 2D to 3D CAD
  2. 3D Drawing from engineering plans
  3. Drawing everything but the kitchen sink
  4. More Advanced Modeling
  5. The Shower
  6. The Sink
  7. The Toilet
  8. Walls and Floors
  9. The Roof
  10. Windows and Doors
  11. Create your own components
  12. Rubber Duck
  13. Laser-cut puzzle project

Note: This series is intended as a guide to demonstrate how to use different aspects of 3D modeling tools. It may not always demonstrate the fastest way of getting the result. Keep coming back to see if we cover a faster technique at a later date.

Rose Barfield

by Rose Barfield - CAD User Experience & Interface Design Specialist

LinkedIn logo (b&w)

Rose is responsible for taking user feedback and improving the BricsCAD product. Before coming to BricsCAD, she was a CAD user and worked in the Automotive, Aerospace, and Defense industries as a Technical Illustrator. She loves finding out how things work, taking them apart, and (hopefully) putting them back together again.

July 8, 2024 3 min

Engineering Production Materials made Easy with BricsCAD® Mechanical V24

Assembly technicians require a thorough set of production materials to complete their jobs efficiently. It's also imperative that the creation of these materials be as straightforward as possible to ensure everyone, from engineers to technical illustrators, can play their part efficiently and accurately. With BricsCAD® Mechanical V24, generating these materials is simple.

June 10, 2024 4 min

Reverse Engineering with BricsCAD Mechanical V24

In the rapidly evolving field of mechanical design and manufacturing, staying ahead means adopting tools that simplify and enhance the design process. BricsCAD Mechanical V24 emerges as a game-changer in this respect, particularly with its cutting-edge Reverse Engineering capabilities. This blog delves into how BricsCAD Mechanical V24 is enhancing the design process by making the complex simple and the impossible, possible.

June 10, 2024 4 min

5 Reasons why you need BricsCAD® Lite

Your choice of CAD software significantly impacts your design process, productivity, and, ultimately, the success of your projects. If you're in the market for robust yet intuitive 2D CAD software, look no further than BricsCAD® Lite! Here are five reasons to choose BricsCAD® Lite for your 2D drafting and design projects.

Follow us on social media