In the first blog post in this series we looked how to extrude a simple house layout from a 2D plan. However, there is a better and faster way of doing this! In this post I'm going to show you how to use QuickDraw and a few other handy BIM tools to get this project moving. There are still many, many ways of using BricsCAD, but this will give you a good starting point.
This week you will need BricsCAD BIM. Don't worry, if you don't have BricsCAD BIM. You can still use QuickDraw with our free 3D modeling software: BricsCAD Shape
New commands covered:
 BIMQUICKDRAW
 PSO(POLYSOLID)
 BIMCLASSIFY (BIM tag)
- Properties Panel -- BIM data
Floor 0
I began with QuickDraw. I then used the PolySolid tool, extruded a floor and assigned BIM properties to create the basic layout. The ground floor is going to be a shop, so I am leaving open plan. We will cover this area at a later date.
How to Do This
- Access BIMQUICKDRAW and draw the outline of your building. QuickDraw snaps to the origin (0,0,0).
Note: Use TAB to switch between dimensions.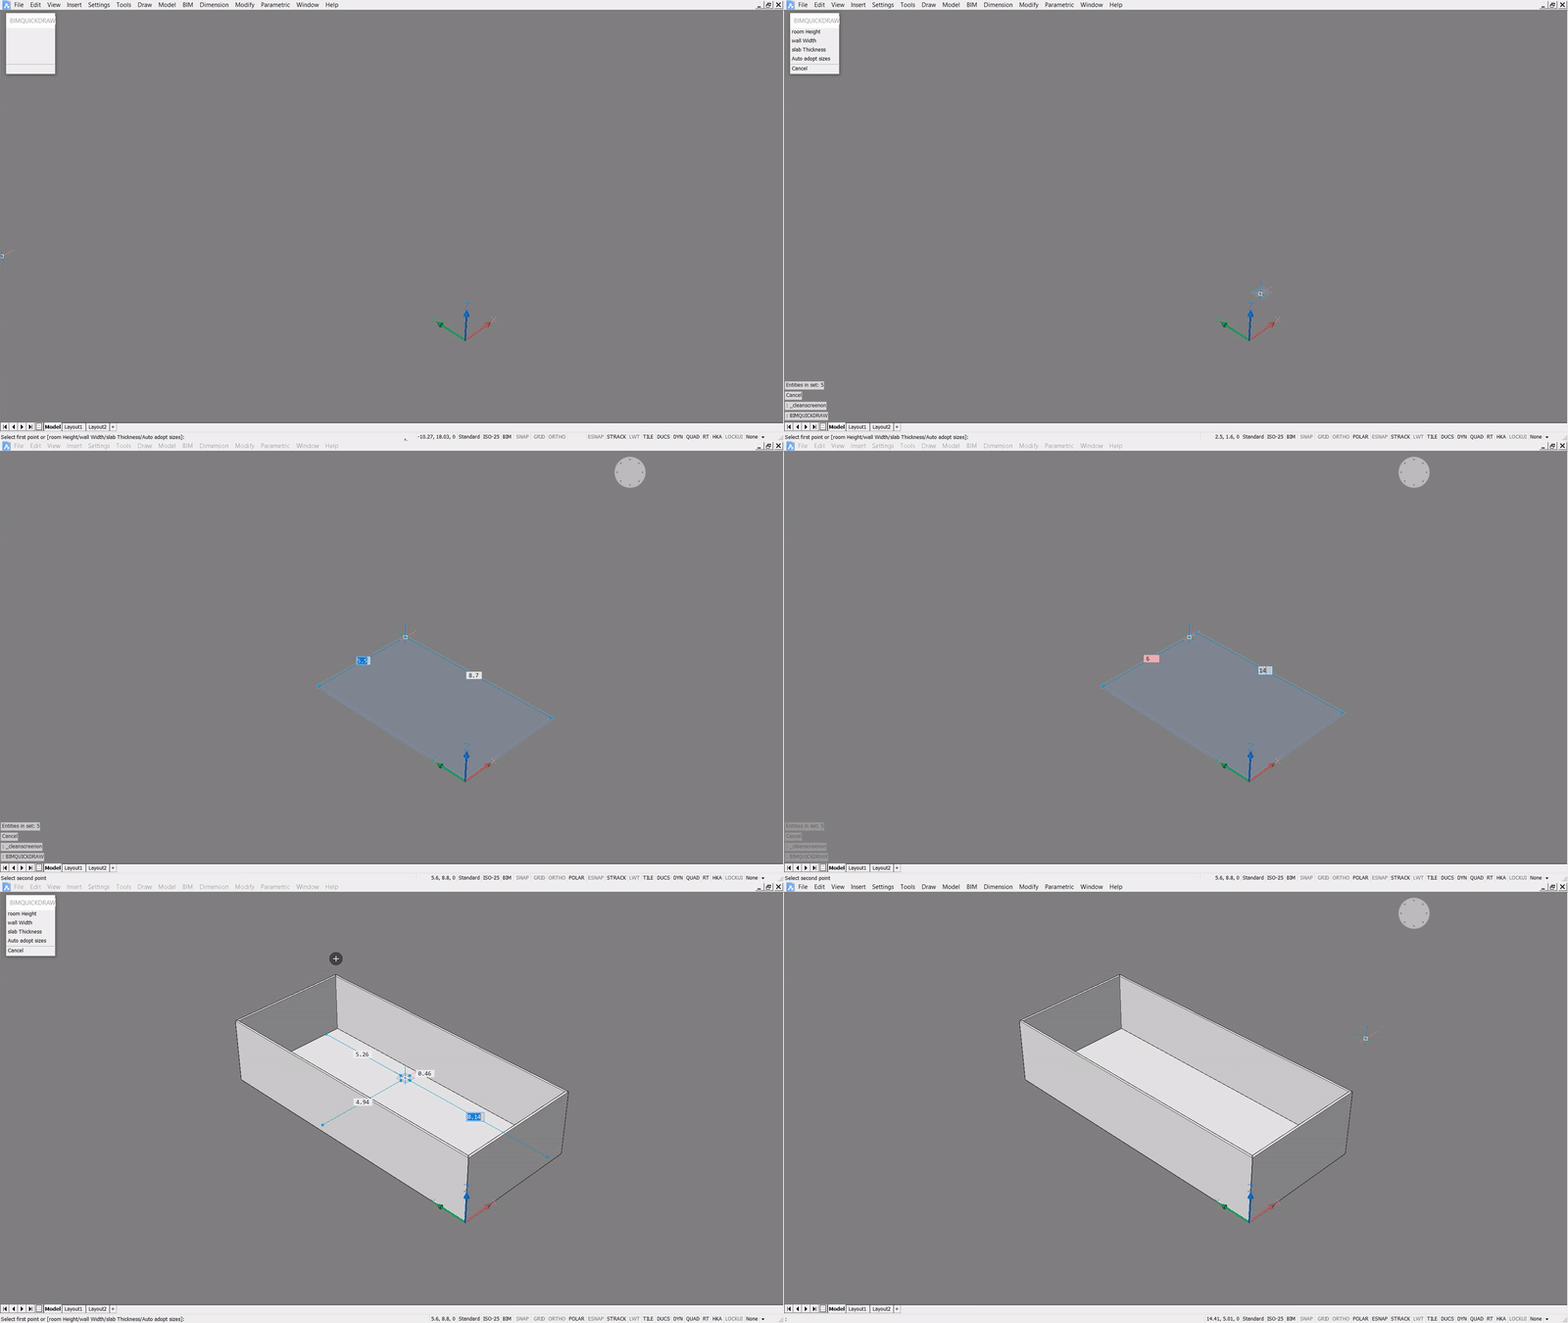
You can change the height, wall thickness, and slab thickness. For this example I am using wall Width: 0.1. slab Thickness: 0.25.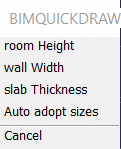
- Use POLYSOLID to draw an angular extension at the back of the building. Hit Ctrl to change the alignment of the polysolid. Here I am using "Right justify".
Note: Set the polysolid thickness to match the walls.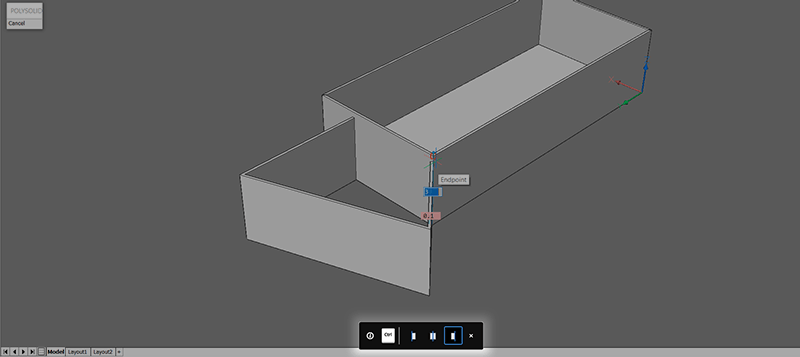
- Use Connect to Nearest to tidy up the junction.
Note: If you can't remember how to do this, see Part 1.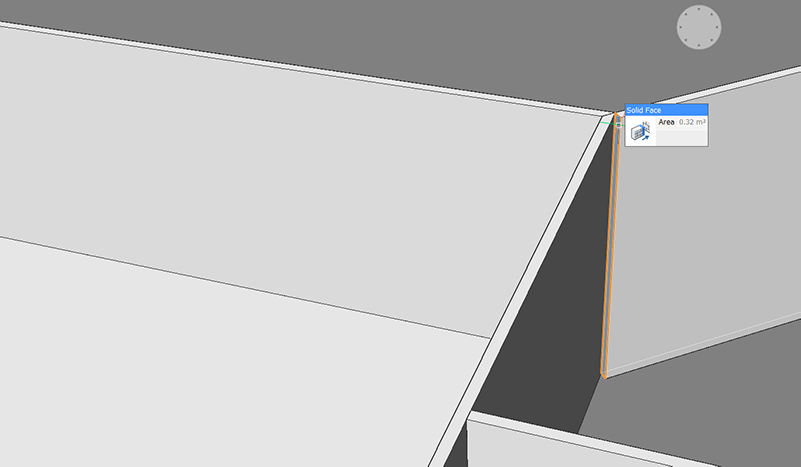
- Now hover over the boundary and EXTRUDE up.
Note: If you can't remember how to do this check part 2.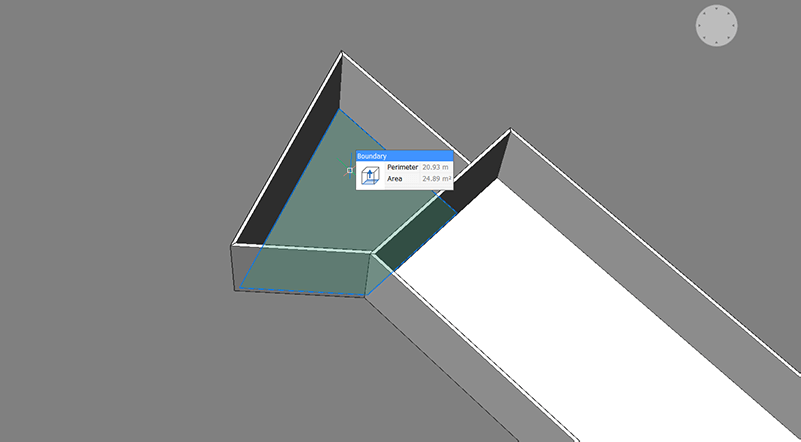
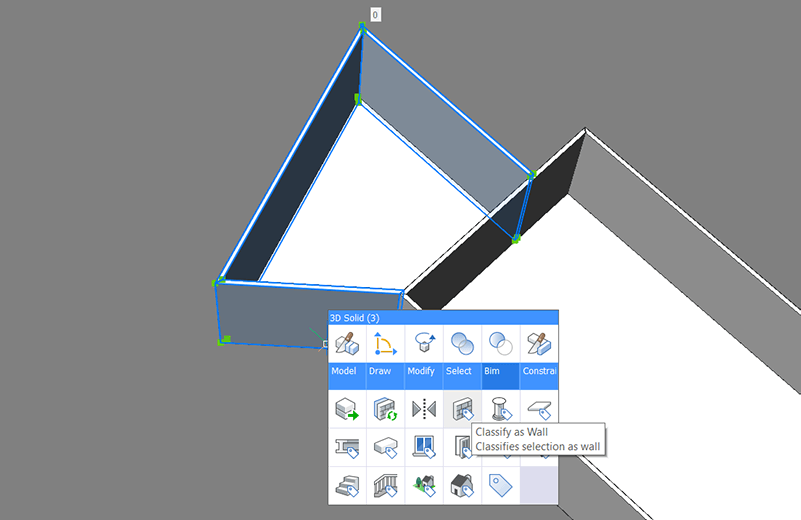
- BIMCLASSIFY the newly created walls: 'Wall'.
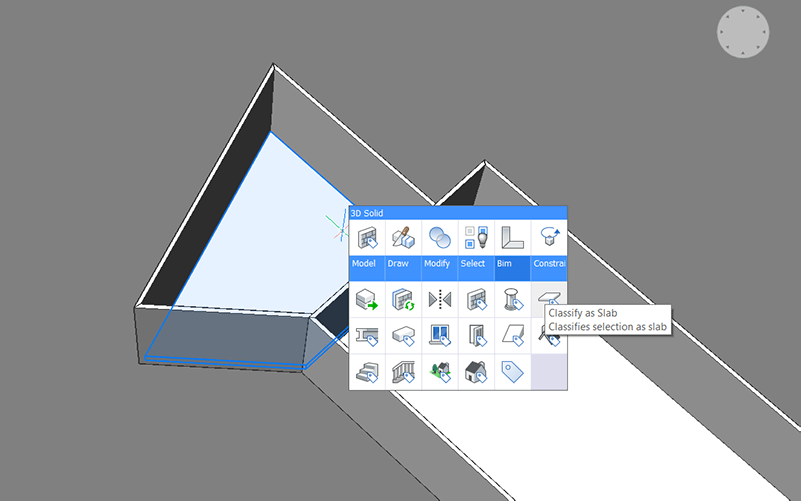
- BIMCLASSIFY the newly created walls floor:'Slab'.
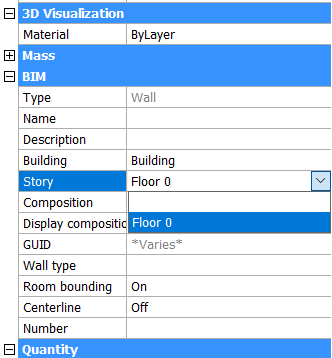
- Select all the newly created BIM objects. In the Properties panel change the values: Building: Building. Story: Floor 0.
Floor 1
I duplicated the floors and edited with Quickdraw. I also added 2 balconies with Slice and Extrude.
How to Do This
- Use QUICKDRAW. Click the
 plus sign in the corner of the building to duplicate the layout to the second floor. Select 'Fully copy the top floor'.
Note: Because we have assigned the BIM data (spatial location) to the elements on Floor 0, these elements were also duplicated. QuickDraw copy doors, windows, columns and any other elements that have been assigned the correct data. Read more on BIM classification.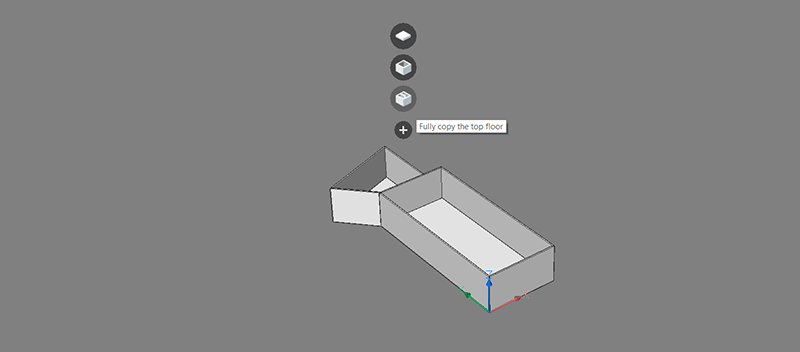
- Now add a room to your building. QuickDraw automatically snaps to existing walls. Drag and click or manually type in the dimension of the room. You can choose to use internal or external measures as constraints.
Note: Make sure that DYN (Dynamic Dimensions) is switched 'on' or you will not be able to manually type in the dimensions.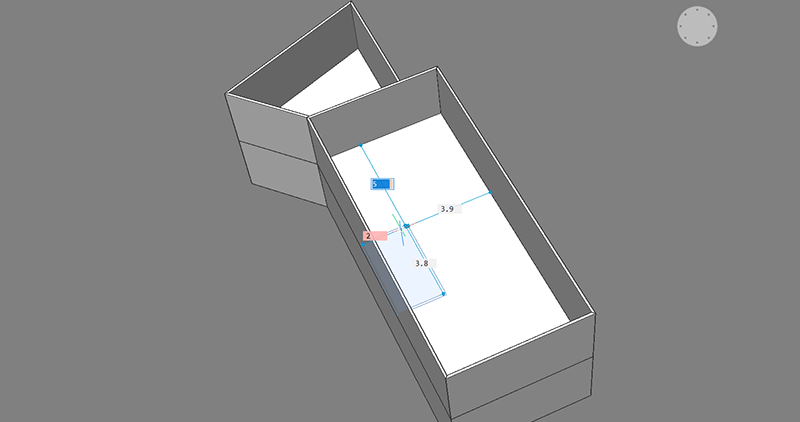
- Draw another room.
Note: QuickDraw automatically aligns to other drawing elements, keeping rooms inline and allowing you to model quickly.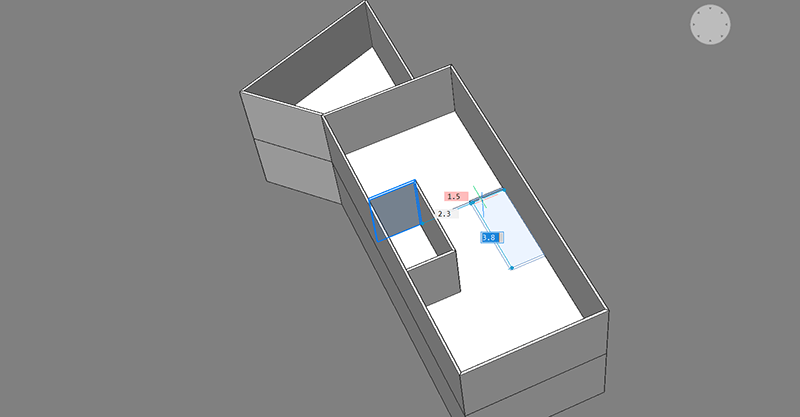
- Continue with QuickDraw to complete the layout of the second floor.
Note: QuickDraw correctly finishes the connections between the walls.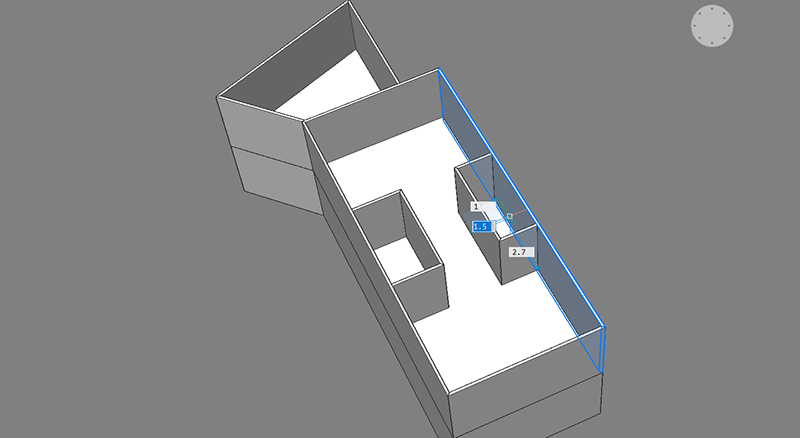
- Use Multi-Slice to cut the end panel. Height from ground: 1.3.
Note: If you can't remember how to do this, see Part 3.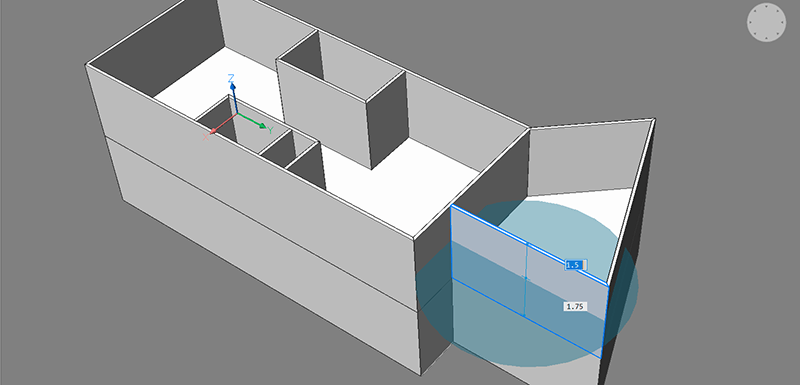
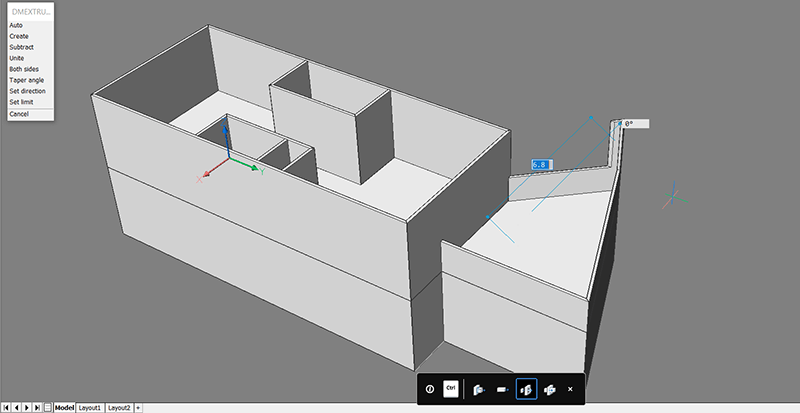
- EXTRUDE the face with the 'Subtract' Option. You've now created a balcony. Simple!
- Draw a rectangle between the walls of the small roof on the left of the house. Height from the ground: 1.3.
Note: Hit Shift to assign the UCS to the wall face, the face will turn blue.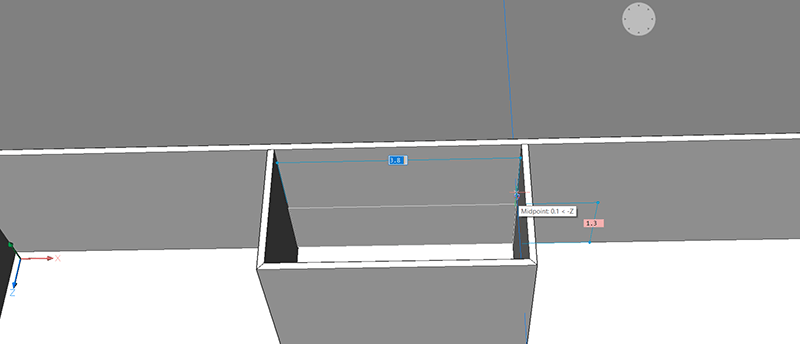
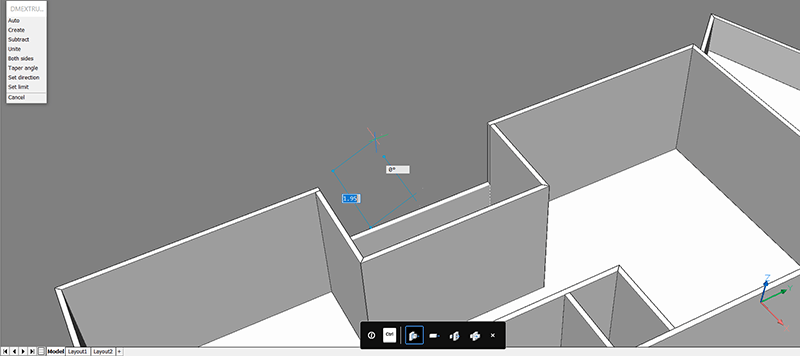
- EXTRUDE the boundary to create another, smaller balcony.
Floor 2
I duplicated the layout from Floor 1 and edited using QuickDraw, Extrude, and BIMDrag. I then added another balcony using the same techniques as Floor 1.
How to Do This
- Use QUICKDRAW. Click the
 plus sign in the corner of the building to duplicate the layout to the second floor. Select the 'Fully copy the top floor' option.
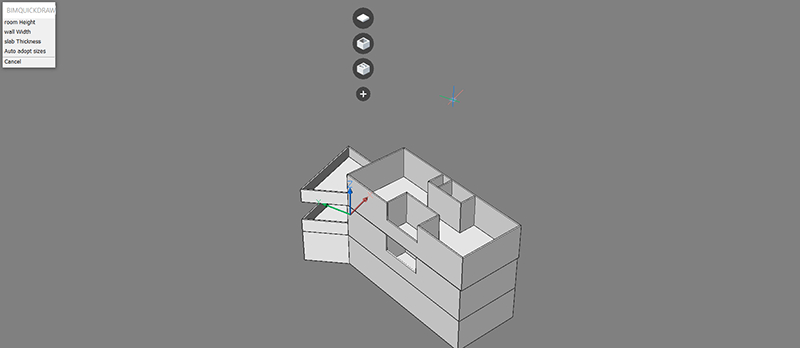
- ERASE the balcony.
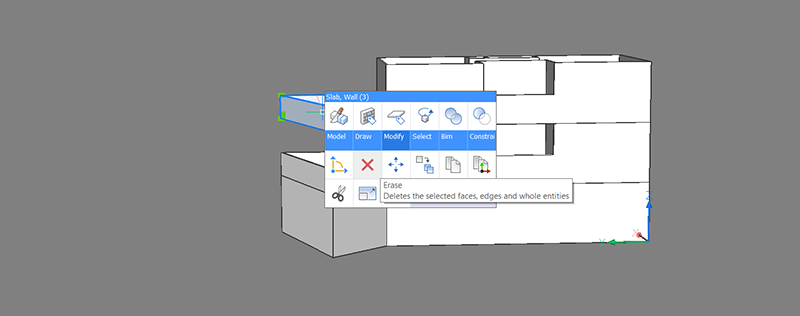
- Extrude the boundary above the lower balcony.
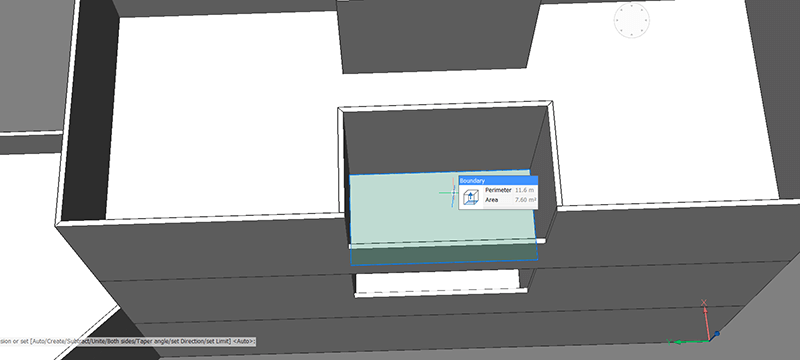
- Repeat for the wall.
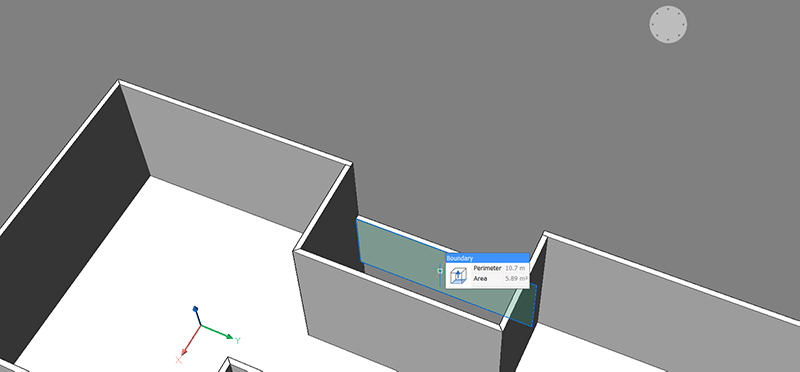
- Use BIMQUICKDRAW to add a small room.
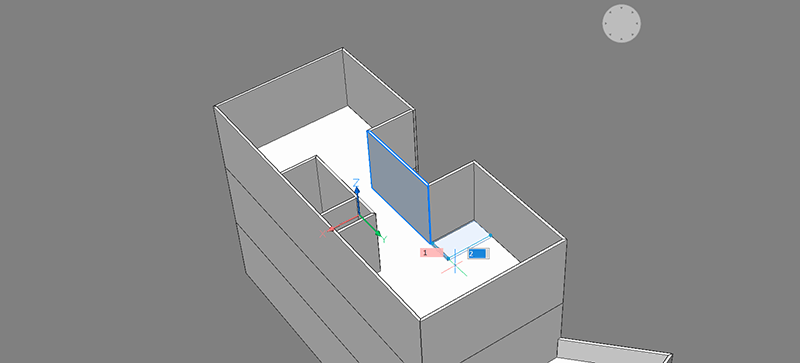
- ERASE the wall on the other side.
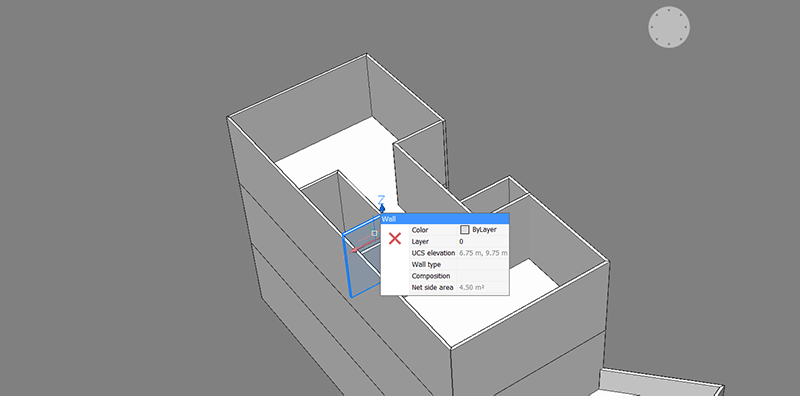
- Click the wall face and use BIMDRAG to move the wall. The adjoining walls will move at the same time.
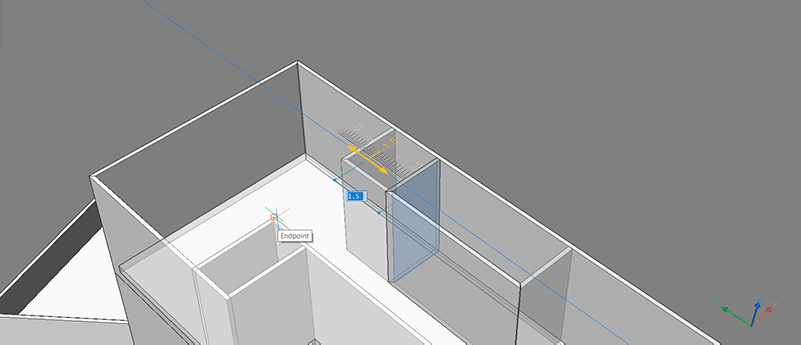
- Use BIMQUICKDRAW to finish the layout.
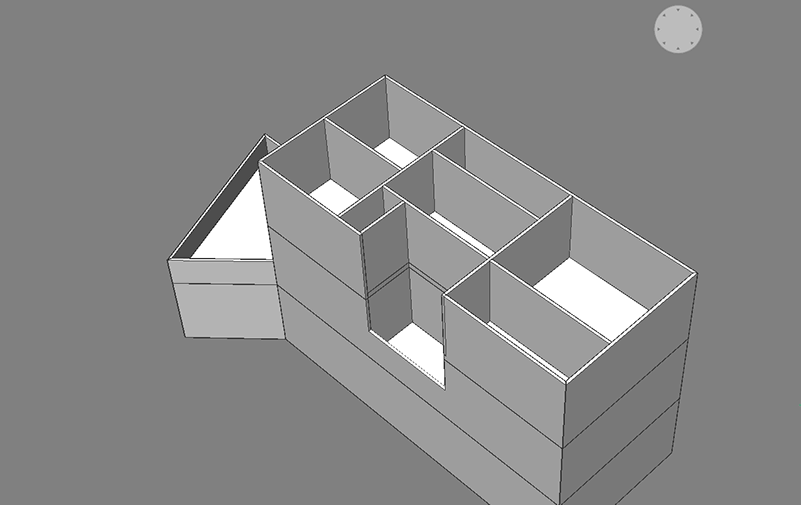
- Repeat steps 8 and 9 from Floor 1 to complete the balcony.
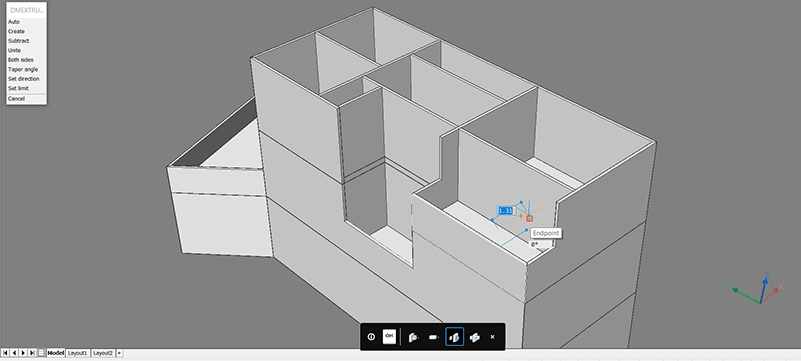
Outhouse
As a final touch, I added an angled outhouse using QuickDraw and custom UCS.
How to Do This
- Type UCS into the command line.
- Set the UCS to align with the face of the back balcony.
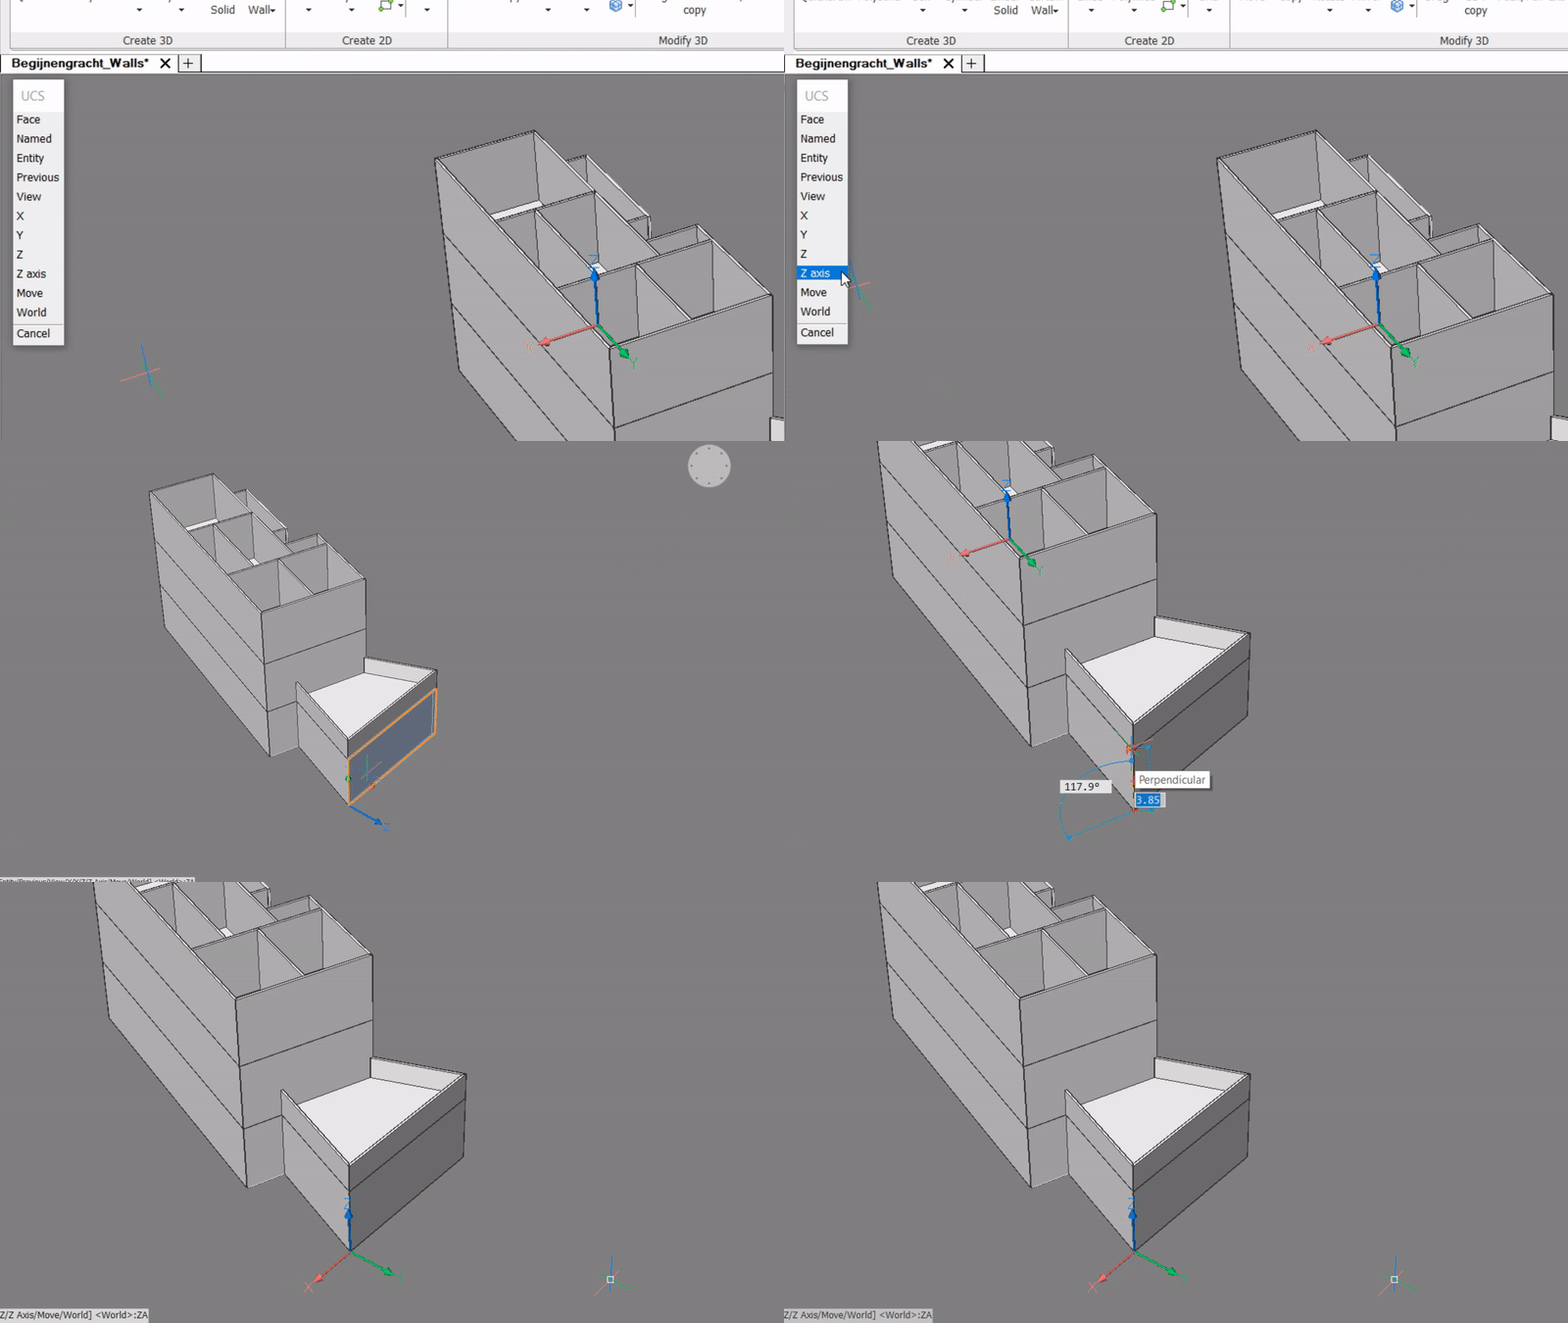
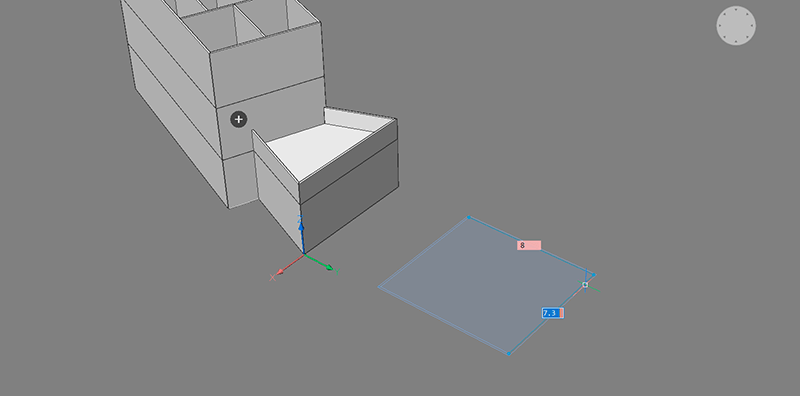
- Draw a simple garage with BIMQUICKDRAW. QuickDraw is now aligned to the new UCS.
- Add a flat roof using QuickDraw. Click the plus symbol and choose 'Finish the building with flat roof'.
Note: The structure browser displays this as a different building, if you duplicate the layout, it only duplicates the details from this building.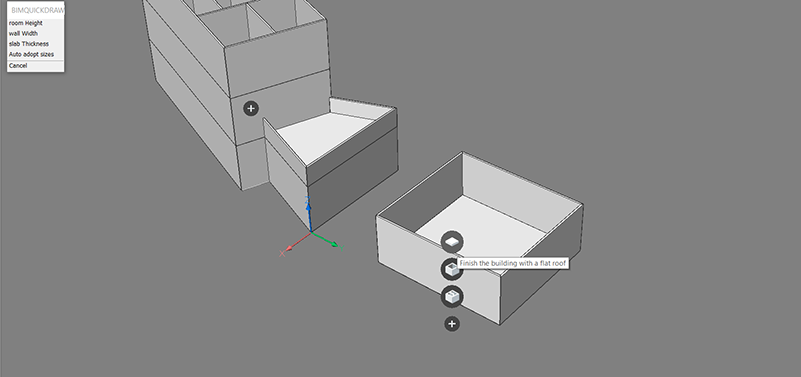
The final result should look something like this:

Next Time
It might not look like much yet, but join us next time when we look at how to add a roof using BricsCAD BIM.
Don't have BricsCAD yet?
Easy to try, easy to buy, easy to own. That's BricsCAD. Try all of our products, for free for 30 days at www.bricsys.com. Freedom of choice, plus perpetual (permanent) product licenses that work with all languages, in all places. You'll love what we've built for you with BricsCAD.
Keep Reading
- Moving from 2D to 3D CAD
- 3D Drawing from engineering plans
- Drawing everything but the kitchen sink
- More Advanced Modeling
- The Shower
- The Sink
- The Toilet
- Walls and Floors
- Windows and Doors
- Create your own components
- Rubber Duck
- Laser-cut puzzle project
Note: This series is intended as a guide to demonstrate how to use different aspects of 3D modeling tools. It may not always demonstrate the fastest way of getting the result. Keep coming back to see if we cover a faster technique at a later date.



 plus sign in the corner of the building to duplicate the layout to the second floor. Select 'Fully copy the top floor'.


 plus sign in the corner of the building to duplicate the layout to the second floor. Select the 'Fully copy the top floor' option.


