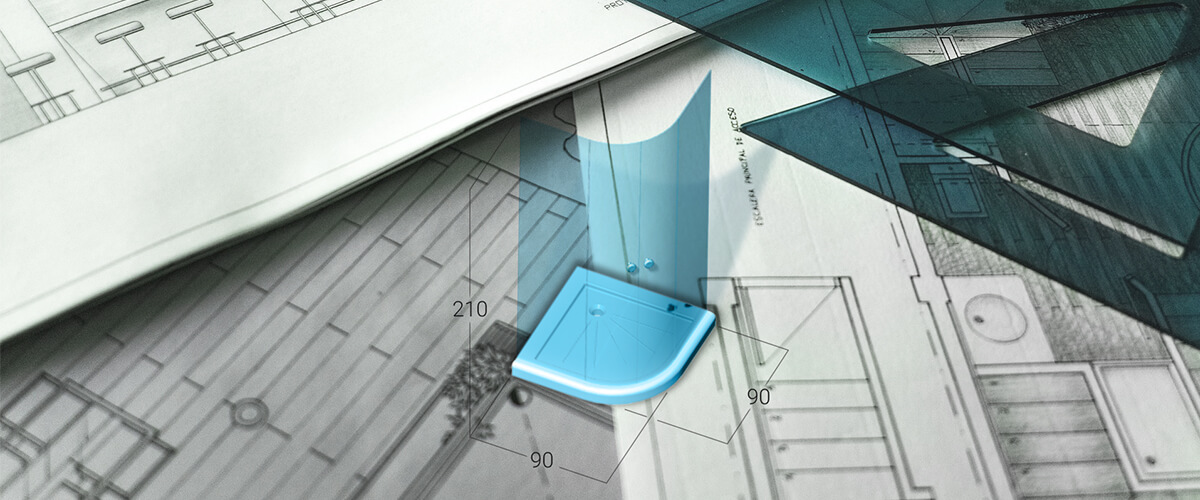
Last week I showed you how to model a simple shower in BricsCAD. Learn some some of the more advanced CAD techniques.
Commands covered this week
The shower tray
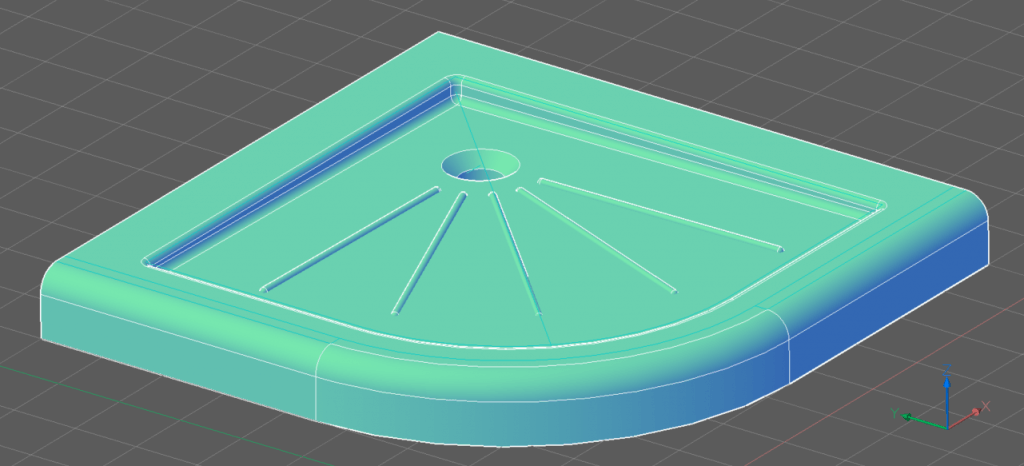
To start I made the basic shower tray shape using the box tool. I then filleted, used offset and extruded the box to get the basic tray shape. Next, I added a plug hole, fixed a slope to the shower base, rounded off the details with fillet and chamfer, and added foot grips using a polar array.
To do this:
Start by drawing a box with the BOX command. -- 90x90x10.
FILLET one corner. The radius is 45.
OFFSET the top edge. The distance is 10.
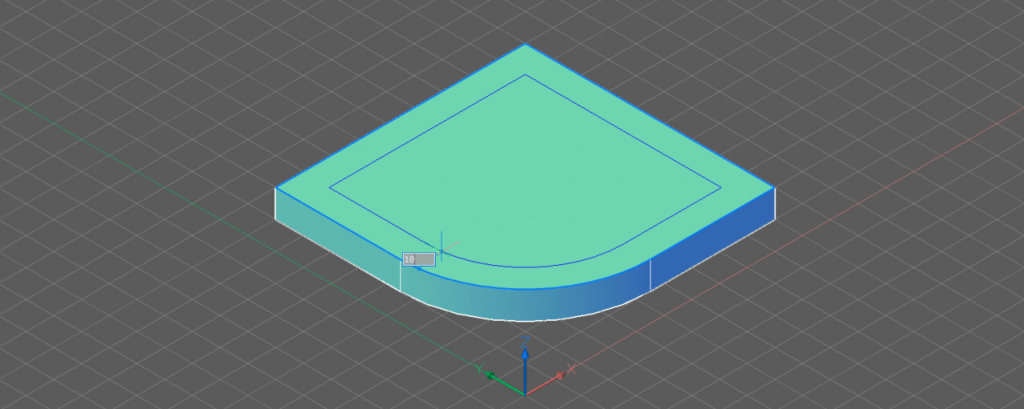
EXTRUDE the new boundary down. The distance is 2.
Draw a line diagonally from one corner to the middle of the curved edge.
Use this line to align the center of a circle. This will be the plug hole.
Note: Hit Shift during the drawing command to align the coordinate system to the surface of the 3D solid. The surface will turn blue. (See last week for more details)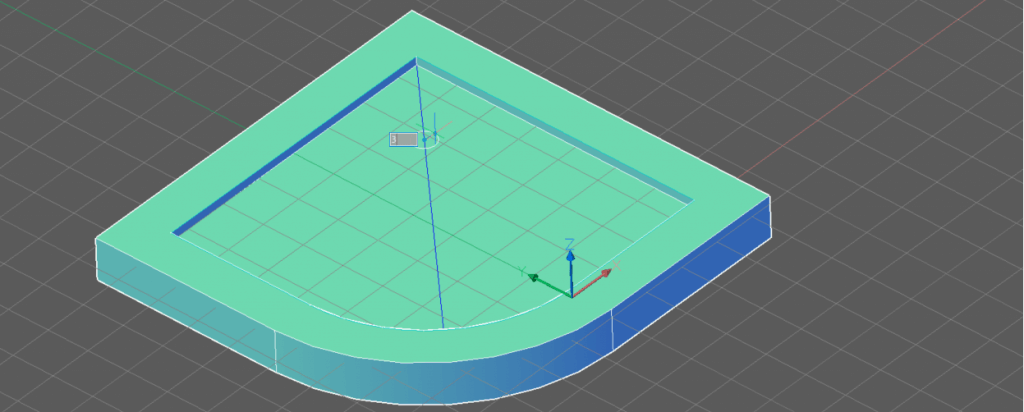
EXTRUDE the circle down.
Use Taper Face. Select the inner surface of the shower tray. The starting point of your taper is the middle of the curved edge. The endpoint of the taper the opposite corner. (The same endpoints as your guideline). The taper angle is 1.

Note the slope of the surface. The blue line was previously in line with the inner portion of the shower tray.
Use DMFILLET. Select all vertices of the inner surface. The radius is 0.5.
Use DMFILLET. Select the edge of the front of the tray. The radius is 4.
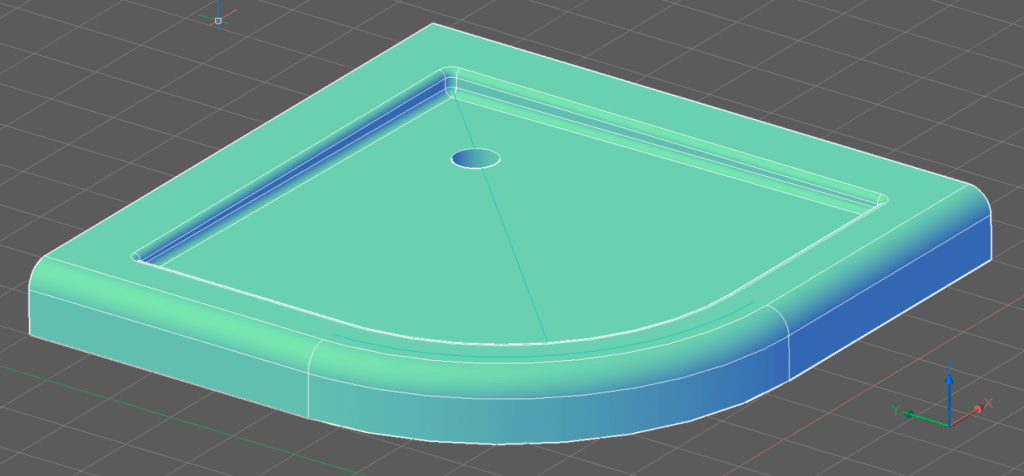
Add a chamfer to the plug hole. Use DMCHAMFER. The chamfer distance is 3.
Draw a line. The length is 45. The starting point is the center of the plug hole.
Now draw a circle from the center of your plughole. The radius is 5.
Note: Align your tool to the surface of the tray by pressing Shift during the drawing command.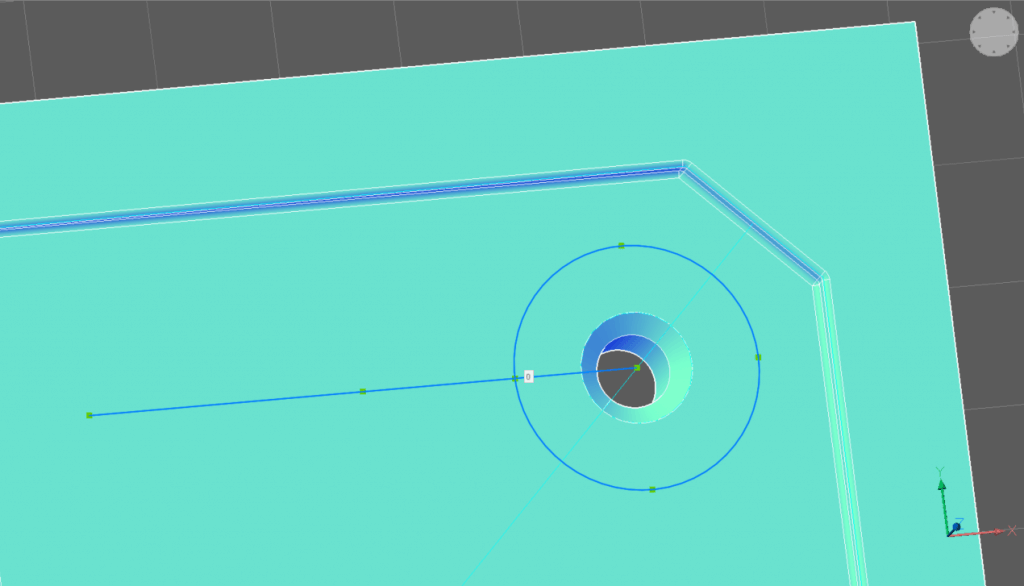
Use TRIM to cut the line. Use the circle as the trim boundary.
Now DELETE the circle.
In a new location, draw a cylinder. The radius is 0.5, the length is 40.
Use FILLET on the edges of the cylinder. The radius is 0.4.
Use ALIGN to position the cylinder along the line. Set the snap point to the center of the top and of the cylinder and the endpoints of the line.
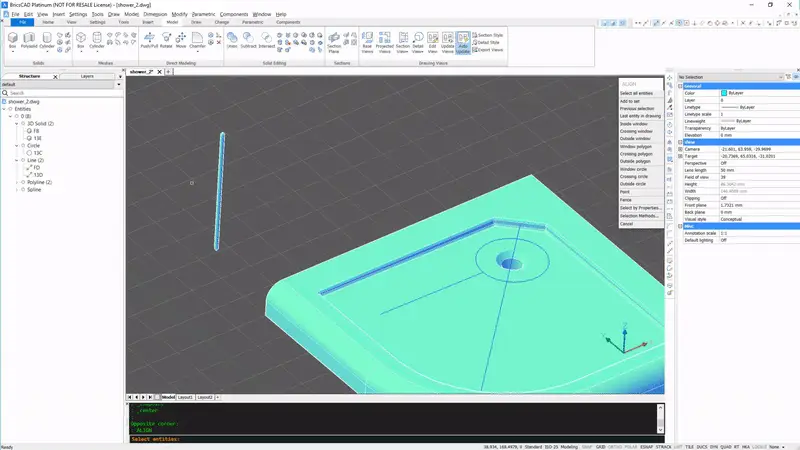
Use ARRAYPOLAR to copy the cylinder. The fill angle is 90, items are 5, the center in the center of the plug hole.
The doors
I then created the shower doors. I did this by measuring the placement of the door, then created a simple box to make a "wall" and repeated this for the other side. Afterward, I offset the front edge to the end of the vertice wall and swept the face of the wall along the curve to make a "door". I split the door in half with a slice and finished it off with a handle.
To do this:
Draw a rectangle on the top surface. Your snap point is the edge of the straight vertice on the front end. The width is 2. Snap to the end of the straight vertice.
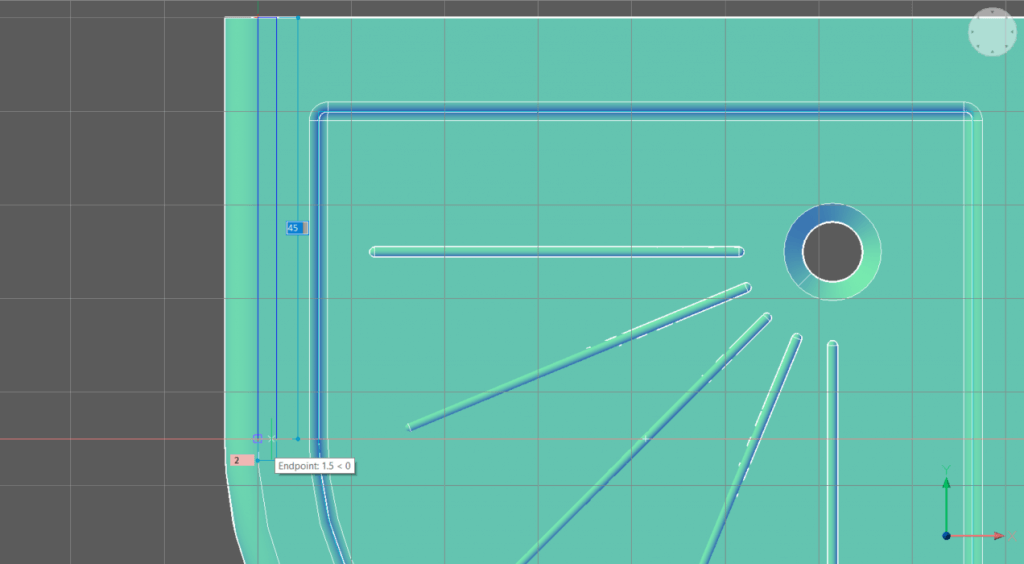
Use this as a guide and draw a box. The length is equal to the box you just drew. (Use Esnap -- Endpoints) to guide you, the width is 1, the height is 200.
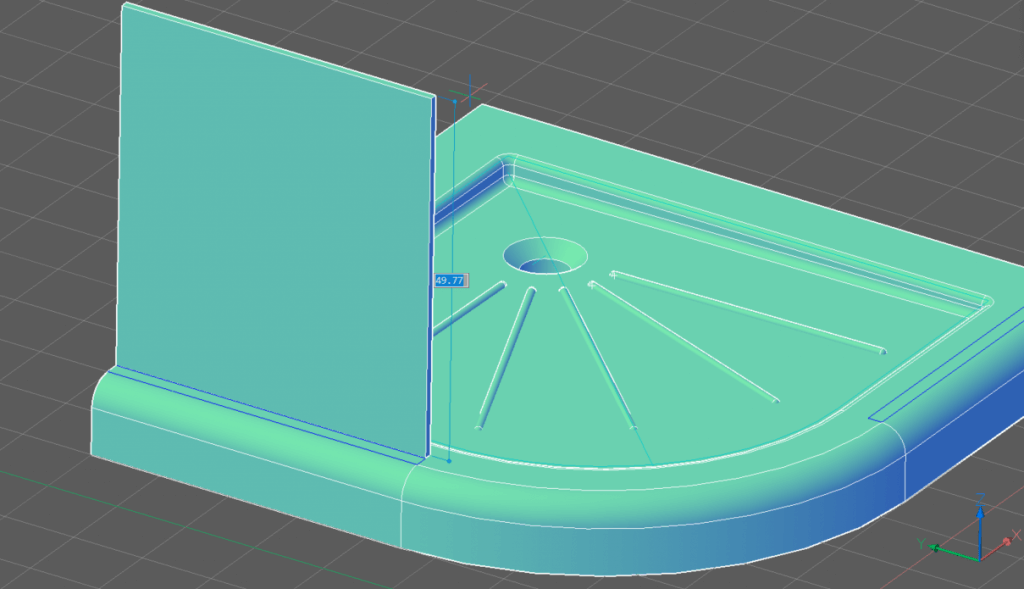
Repeat the step for the other side.
Or Mirror the wall along the guideline you drew earlier.OFFSET the curved edge of the shower tray. The distance is 2.
Or OFFSET the curved edge of the shower tray, snap to the front of the wall.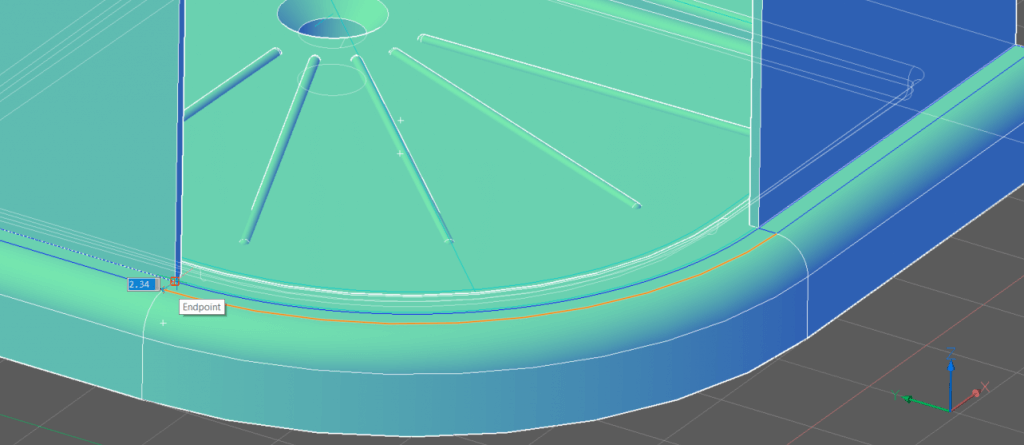
SWEEP the face of the wall along the curve.
Note: Be sure to sweep from the first vertice of the curve. Find this in the Properties panel. (See last week for more details).Use SLICE on the door. The start and end point of the cutting line are the middles of the two curved vertices at the top.
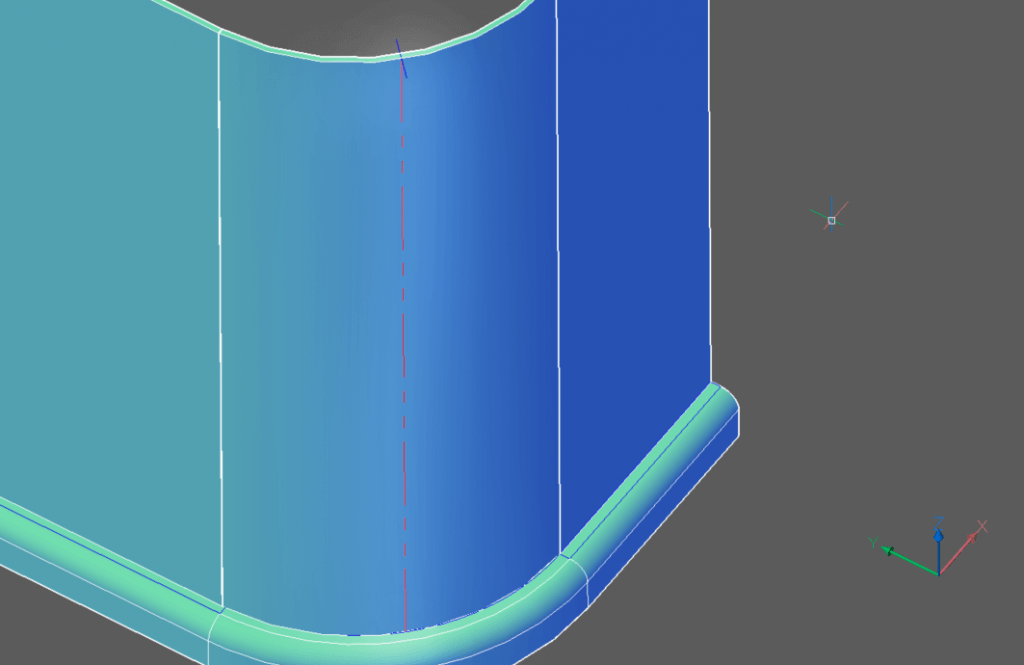
Blue line: Slice line. Red, dotted line: Direction of slice.
To finish, change the transparency of the doors to 70%.
Final touches

Finally, I made a simple handle and added this to the door. I used the CYLINDER, MOVE FILLET and TCONNECT (connect to nearest) commands. For more details on these commands please read parts 1 and 2.
Next time
Join me next week when I show you how to make a sink in BricsCAD.
Don't have BricsCAD yet?
Easy to try, easy to buy, easy to own. That's BricsCAD. Try all of our products, for free for 30 days at www.bricsys.com. Freedom of choice, plus perpetual (permanent) product licenses that work with all languages, in all places. You'll love what we've built for you with BricsCAD.
Keep Reading
- Moving from 2D to 3D CAD
- 3D Drawing from engineering plans
- Drawing everything but the kitchen sink
- More Advanced Modeling
- The Shower
- The Sink
- The Toilet
- Walls and Floors
- The Roof
- Windows and Doors
- Create your own components
- Rubber Duck
- Laser-cut puzzle project
Note: This series is intended as a guide to demonstrate how to use different aspects of 3D modeling tools. It may not always demonstrate the fastest way of getting the result. Keep coming back to see if we cover a faster technique at a later date.
