Our previous blog post explained how Artificial Intelligence in smart cleanup tools help to keep your design data healthy, accurate, and compact. Aside from importing or reusing existing design data upstream and preparing it for export or further processing downstream, the editing and detailing of 2D or 3D design data are at the heart of CAD.
Where it all started
It all started almost 70 years ago, in pursuit of replacing pencil and paper with something more accurate, more maintainable, and more efficient to update a design after creating it without throwing the paper in the trash and starting from scratch.
Despite the tremendous evolution of CAD systems since the first CAD program debuted in 1957, typical CAD has yet to really deliver its promise of truly aiding the designer. Maybe this is because the baseline (drawing with pen and paper) is – relatively speaking – so user-unfriendly that even a mediocre, kind-of-intuitive, solution suffices. This is where we at Bricsys challenge the status quo and engage to go beyond the state of the art. We want to provide CAD solutions that genuinely aid you and automate as many aspects of the detailing work as possible. Here is where Artificial Intelligence kicks in with 2D and 3D editing in BricsCAD Lite and Pro.
The Manipulator
Imagine a world where you can access all the most common 2D and 3D geometry manipulations from one central place. Well, luckily for you - you don’t have to imagine. Instead, you can use BricsCAD’s unique Manipulator.
The Manipulator is one of BricsCAD’s most underestimated functions. It is brilliant because of its simplicity. The graphical coordinate system widget jumps up if you (long-)click any selection of objects and/or sub entities or by launching the MANIPULATE command. An intelligent algorithm determines the initial location of the Manipulator widget that considers the selection set and the relative position of your mouse. Still, you can, at any moment, reposition it to any point you want the editing/modeling operation to start.
Despite its simplicity, it is the most comprehensive editing tool, accessing the most complex operations from shifting a 2D line over push-pulling a face of a 3D solid and connected pipe modeling to sheet metal bending. The flexibility and range of applications of this tool are astonishing. Behind the scenes, BricsCAD’s infinitely powerful free modeling engine is the real star.
ARRANGE
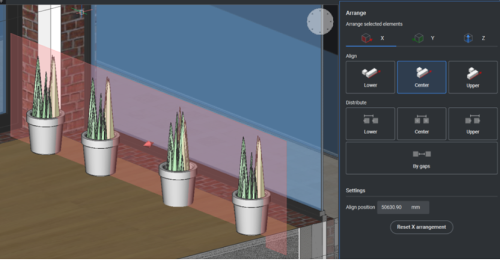
When it comes to spatially aligning or distributing objects in 2D or 3D space along the X, Y (or Z) direction, the unique-to-BricsCAD ARRANGE command makes this an easy job. A slick command panel and buttons with images make it crystal clear what the result of every align or distribute action will be.
Some temporary graphics on the screen complete this simple user interface, visualizing the alignment line (2D) or plane (3D) or the minimum and maximum for the distribution of the objects to be arranged. You can click these temporary graphical objects and drag them to any desired position in the model space. If you prefer a more numerical, precise approach, you can use the command panel to specify two distribution values out of three: the minimum, the maximum, and the gap size.
COPYGUIDED & MOVEGUIDED
Our BricsCAD Usage Data Program teaches us that COPY and MOVE are, without a doubt, two of the most popular BricsCAD tools. This isn’t surprising – copying and moving objects are two of the most basic operations in any design system. This observation was the main impetus for the R&D team to try and optimize the workflows involving these two commands.
We noticed that, typically, objects still need to be tweaked (shifted, rotated, snapped, aligned) to get them in the desired position, and we had an aha moment! Many users want to copy or move entities in a “guided” way: along the direction of some guide curves. This applies to various use cases across industries: whether it comes to placing 2D geometry that represents a chair around a table in 2D interior design or plants around the contour of a lawn in a landscape design. The designer wants to copy or move 2D objects along a curve in both cases. Our unique COPYGUIDED, and MOVEGUIDED commands are the result of this aha moment and, of course, a lot of industrious engineering work!
As with the COPY and MOVE commands, you start with selecting the objects you want to copy/move. However, ensure that your selection region crosses the 2D curves you’d like to define as “guides”. When you’re happy with the selection, blue arrows appear at the extent of the selection of objects. These indicate the points and their respective directions along which the selection set will be magnetically snapped, resulting in smooth “guiding behavior.”
And finally, we wouldn’t be Bricsys if we didn’t think of our users who love to work in 3D. With the COPYGUIDED3D tool, the same concepts apply as with its 2D variant. Based on a set of detail objects and/or sub-entities on the one hand, and a set of reference faces on the other, you can now magnetically snap the copied details magnetically to similar target locations.
CONNECT
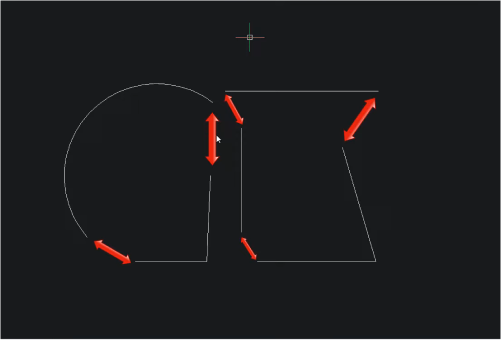
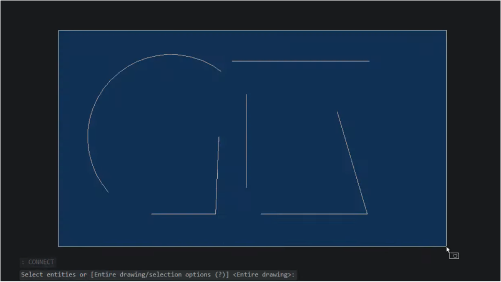
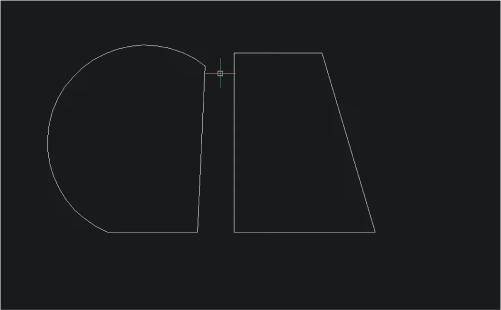
Sometimes it is informative to observe that users are looking for something that doesn’t exist yet. Based on BricsCAD usage analysis, we’ve noticed that many users tried to access functionality to “blend” or “connect” 2D curves together. As the simplest example: extend two non-parallel, non-touching lines to connect them. At that point, we did have the PEDIT command or the FILLET command (where you specify radius 0). However, many users didn’t realize these tools could do the job.
This led to the release of the most easy-to-use tool the R&D team has engineered over the past years: CONNECT. It does what it says on the tin: taking multiple 2D curves as input and smartly extending them to connect them. Problem solved!
Maybe you’ve encountered these tools and found them helpful in your design editing tasks. If not, I hope that after reading this blog, you see value in some of them and will give them a try. Finally, we’re always open to feedback and eager to learn where you spend most of your time in CAD. You never know; we might find yet another opportunity to give you back more time so that you can focus on the creative design work.
Want to know more about BricsCAD?
If you want to learn more about BricsCAD, check out our YouTube channel, or take a peek at the rest of the Bricsys blog.

