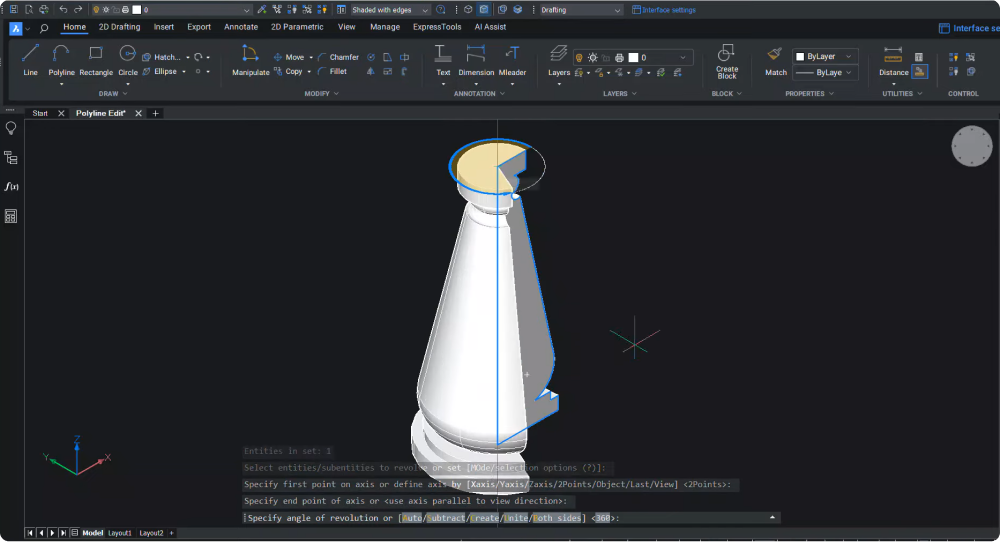
What is a polyline?
Polylines consist of connected line or arc segments that act as a single entity. Each segment can have a constant or varied width, making polylines a versatile tool in 3D modeling.
How to edit a polyline in BricsCAD®
Let's explore the various ways you can edit a polyline in BricsCAD®.

Using the Properties Panel
- Select the polyline you want to edit.
- Navigate to the Tools Panel and open the Properties Panel.
- In the Geometry section, select the vertex you want to change and modify the X and Y coordinate values to change their position.
- Set the starting and ending width for a selected segment.
- Modify the bulge of the segment if needed.
- Assign a global width to all segments.

- Change the polyline's elevation to the desired distance from the XY plane.
- You can open a closed polyline by choosing the No option in the Miscellaneous section.

Editing Polylines Using the Quad
- Activate the Quad via the status bar or use F12.
- Hover the cursor over the polyline entity to bring up the quad menu.

- Expand the modify tool tab in the quad menu to access polyline editing options.
- Use the Add Vertex option to add a new vertex.
- Choose Stretch Vertex to change the polyline shape.
- Click Add Bulge to add a bulge to a selected segment and use Remove Bulge to delete it.
- Use the Stretch Vertex option to move a vertex.
- Click on Remove Segment to delete a polyline segment.

Editing Polylines Using the PEDIT Command
Enter the PEDIT (Polyline Edit) command and select the polyline, and BricsCAD will present you a number of editing options:
Choose Edit Vertices from the command line to adjust the polyline based on vertex points.

You can navigate vertices using the Next Vertex and Previous Vertex options; a vertex is shown with an X mark.
The Angle option allows you to define an included angle for a segment.

Use Break to remove segments from the polyline between two vertices marked with the cross marker. Move the cross marker to the second break point and enter "GO" on the command line to create the break.
You can add a vertex to a specific polyline location using Insert Vertex.
Move allows you to reposition a vertex. With the cross marker, pick the vertex you want to move, click on Move again, and choose its new location using the cross marker.
Regen updates the polyline with the most recent changes.
The Select option lets you select a specific vertex.
Straighten straightens the portion of the polyline between two vertices.
Tangent lets you edit the tangent direction of the vertex.
Define the width for the current segment by using the Width option, and adding the values for starting and ending widths. Then, use Regen to update the widths. You can also use this option to create a uniform width for all polyline segments.
Click Exit to return to the main options of the PEDIT command.
To Use Open and Close options to open and close a polyline.
Fit creates a smooth curve that passes through all the vertices of a polyline.
Decurve removes a curve.
Taper lets you input a tapering width for the entire polyline.

Spline lets you create a spline curve from a polyline. The spline curve won't pass through the vertices. To return to the original polyline, use Decurve.
To reverse the direction of the polyline, choose Reverse direction.
When you're satisfied with your polyline, exit the PEDIT command.

You can now choose the line type you'd like to use. In this example, we changed the line type to DASHDOT.

- Enter PEDIT into the command line.
- Select the polyline.
- Click Linetype mode.
- Select ON to apply the dashes and dots to each segment.
Editing Polylines Using the Right-Click Menu

- Deactivate the Quad from the status bar. Then, select the polyline and right-click to open the menu options.
- Select Edit Polyline to activate the PEDIT command or choose from different editing options.
Options available from the right-click menu include:
- Stretch Segment
- Remove Segment
- Add Bulge
- Remove Bulge
- Add Vertex
- Stretch Vertex
Editing Polylines Using Grips

- Click on a polyline to activate the grips at each vertex location and midpoint of polyline segments.
- Click on a vertex location grip to activate it and move the vertex.
Using these various methods of editing polylines in BricsCAD®, users can explore a rich tapestry of design options and create immaculate 3D models!
Watch the video!
Do you prefer video? Watch the tutorial on the Bricsys YouTube channel!
Want more BricsCAD® Tips?
If you want more BricsCAD Tips, check out our YouTube channel or take a peek at the rest of the Bricsys blog to learn more!
Have you used BricsCAD® and have some ideas or suggestions?
Fantastic! We love hearing your thoughts on BricsCAD® – all feedback is welcome, whether good or bad. The best way to tell us what you think about BricsCAD is to send us a support request; our support team will gladly help.
Get started with BricsCAD® today!
Buy BricsCAD or download the 30-day free trial now and discover how you can accelerate your time to deliverable with BricsCAD.


