1. Filtered search
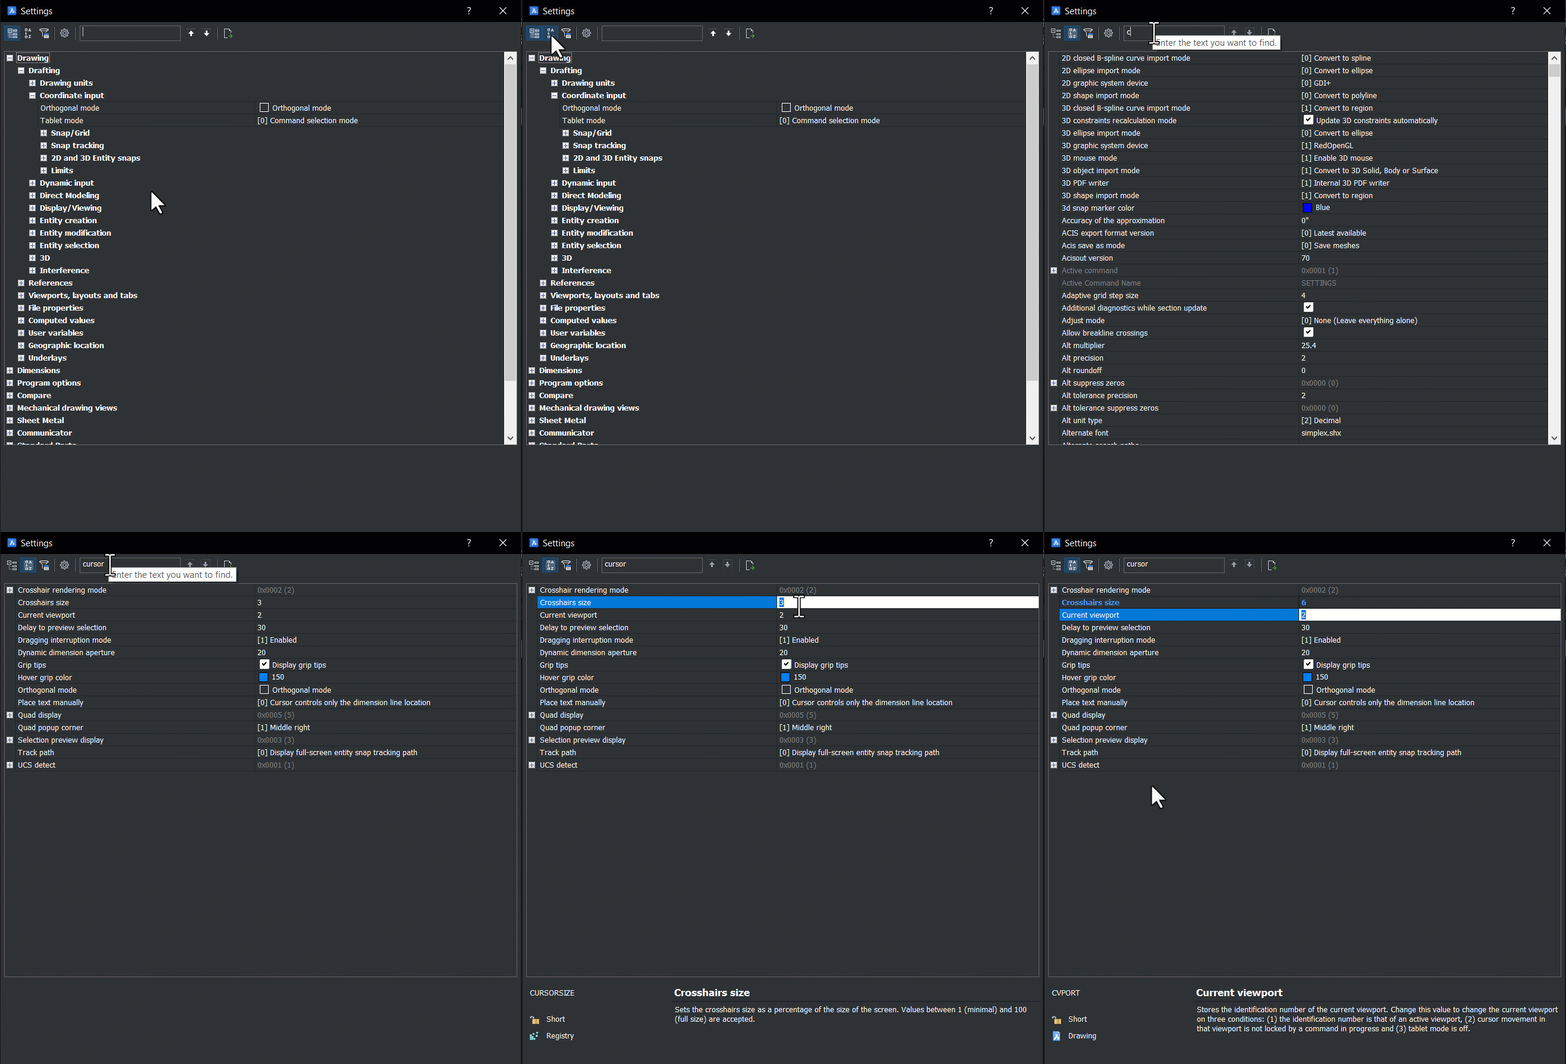
Did you know you can get the Settings dialog to display only the settings that match your search term? This can save you lots of time when you are looking for a setting but aren’t sure exactly where to find it, or exactly what it’s called.
To access this:
- Open the Settings dialog (SETTINGS).
- In the top-left corner, click the Alphabetic option – the second icon.
- Enter a search term and the Settings dialog will only display settings that relate to your search term.
2. DELETETOOL
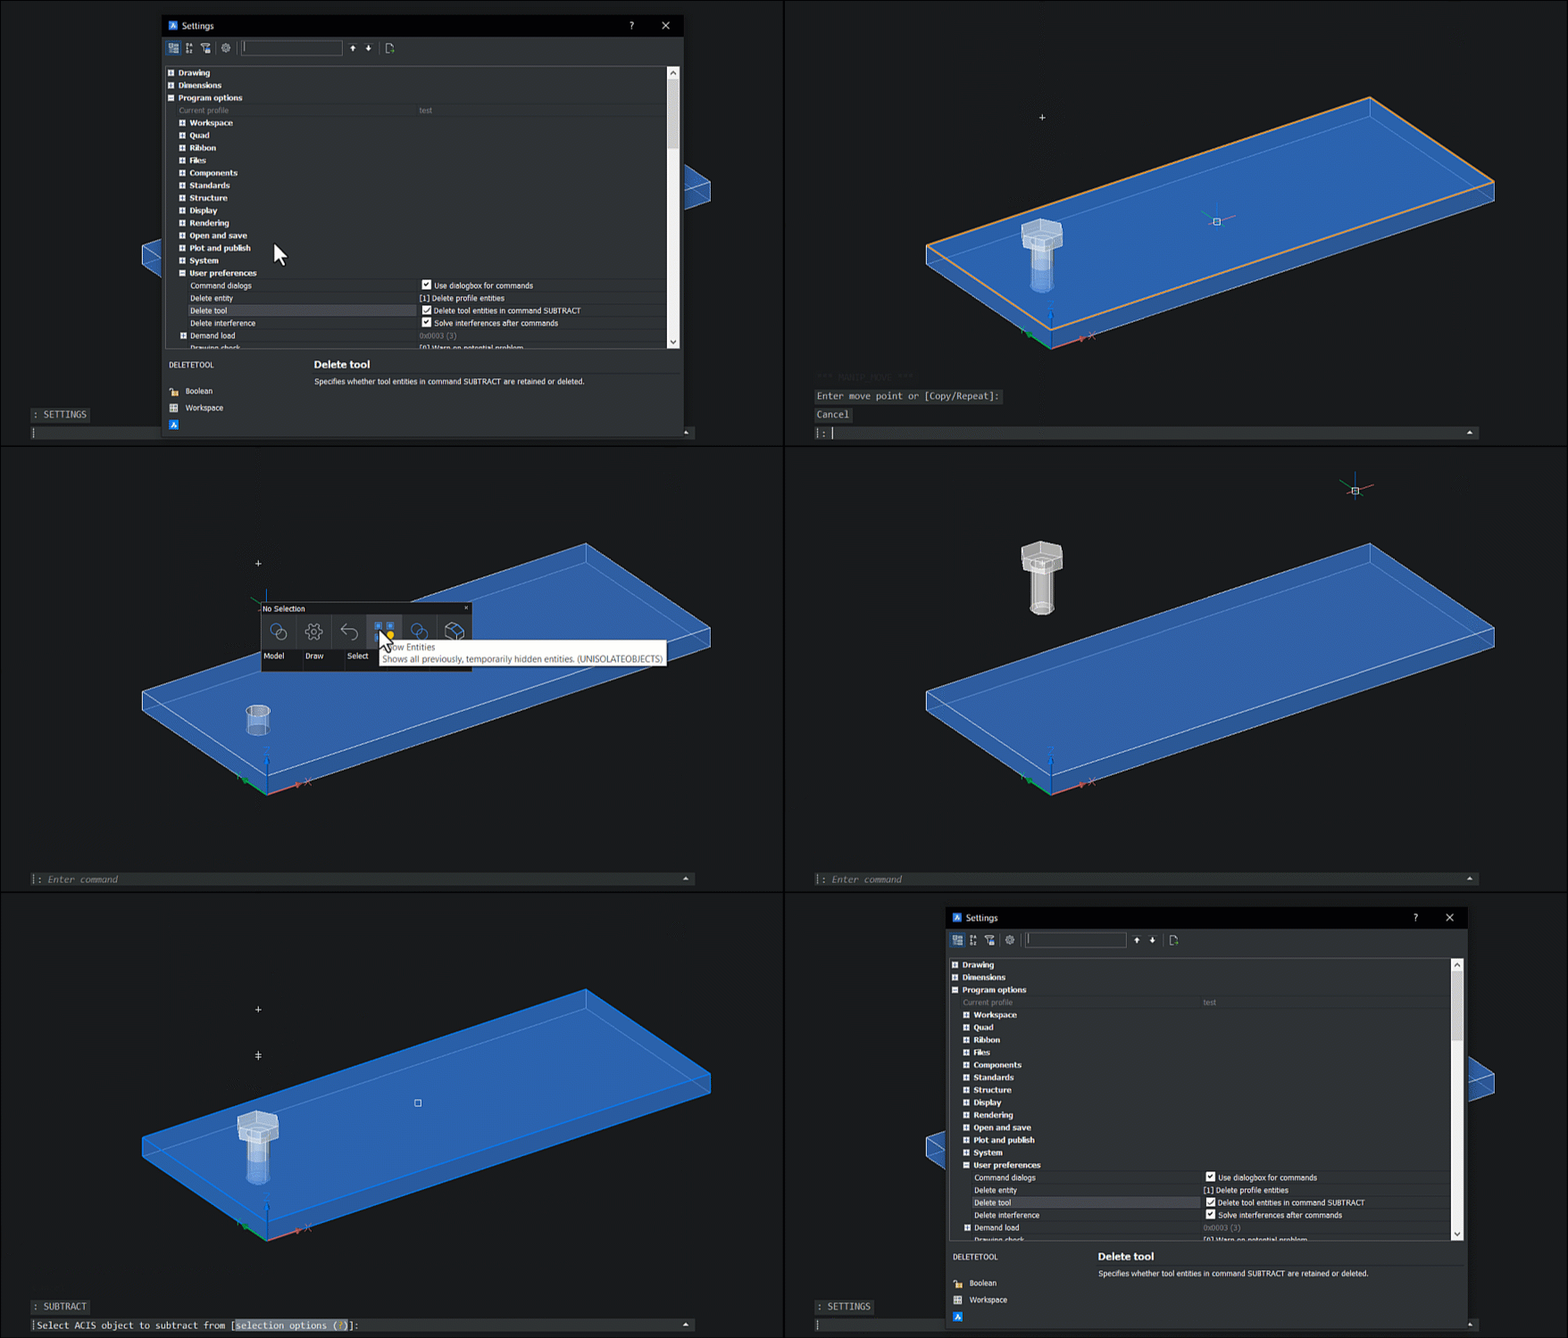
Keep all the entities you're using during the SUBTRACT command. By default, BricsCAD deletes any entities used to subtract, but the DELETETOOL system variable allows you to keep them.
So funktioniert das:
- In the Settings dialog, untick the DELETETOOL system variable – turn it off.
- Exit the Settings dialog.
- Use the SUBTRACT command as normal.
- The entity/entities used to subtract from the second sold will remain in the drawing.
3. UCSORTHO
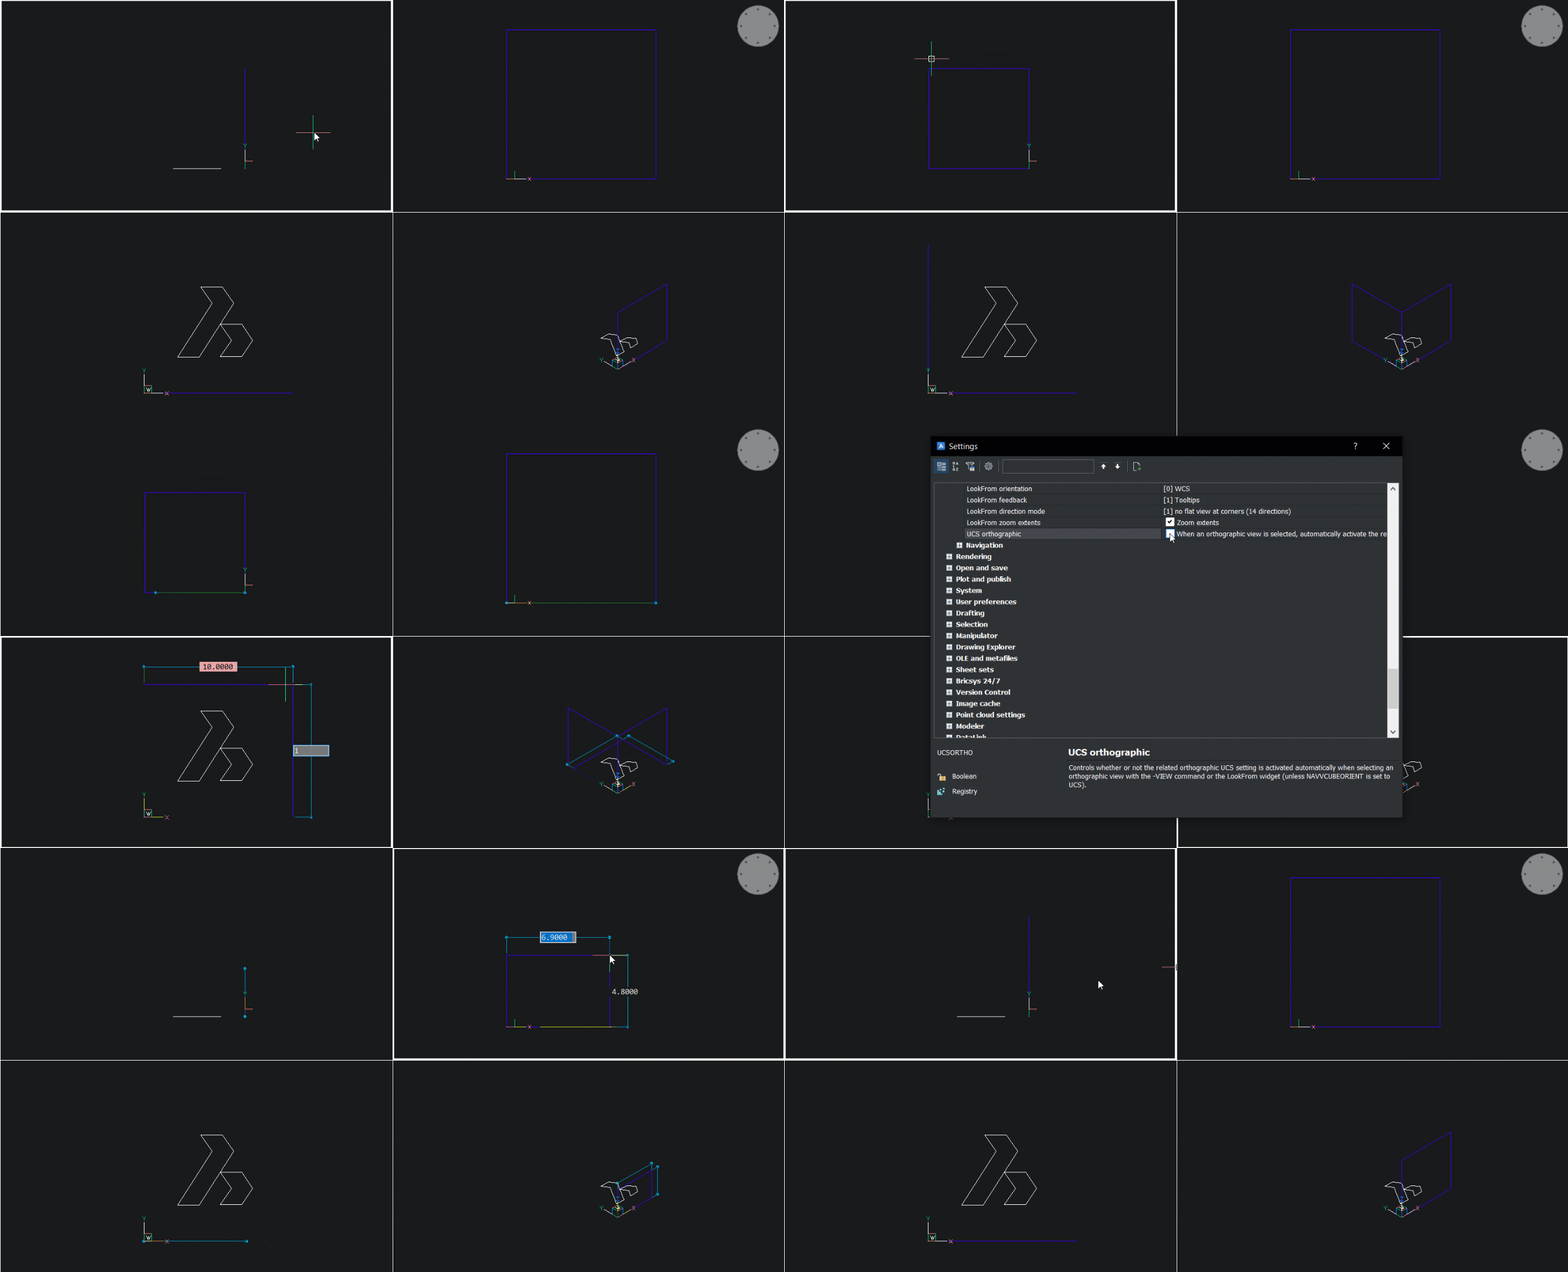
Automatically switch the drawing plane to match the view in the current viewport. By default, BricsCAD® draws on the XY plane, but it is possible to change the drawing plane to match the view by switching on the UCSORTHO system variable.
This only works if the view is set with the LookFrom widget (the circle in the top-right of model space) or the VIEW command.
So funktioniert das:
- In the Settings dialog, check the UCSORTHO system variable – turn it on.
- Exit the Settings dialog.
- Set orthographic view as required. Use either the VIEW command or the LookFrom widget.
- Start drawing.
- Repeat steps 2-3 as required.
4. ORBITAUTOTARGET
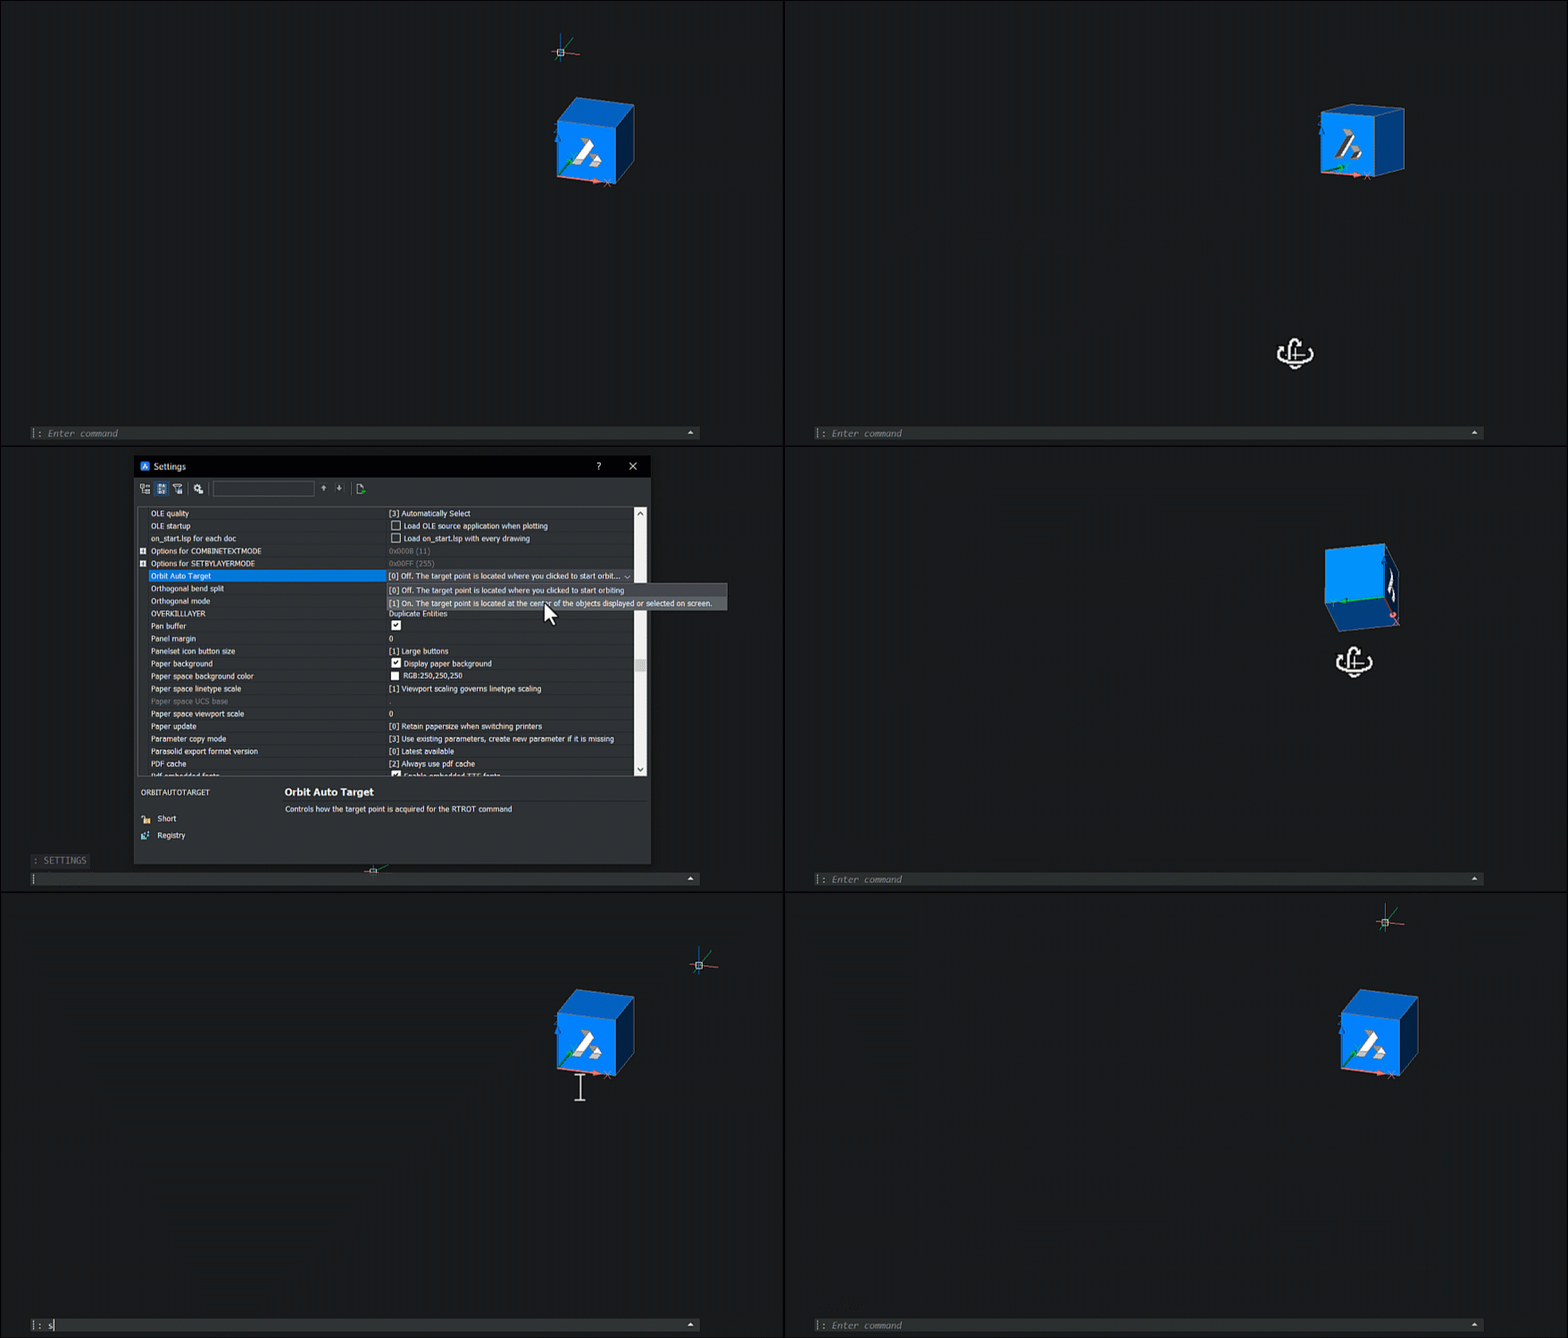
Rotate around any entities displayed on screen, or around selected entities. By default, BricsCAD rotates around the point where you first click. Use the ORBITAUTOTARGET system variable to change this behavior.
So funktioniert das:
- In the Settings dialog, check the ORBITAUTOTARGET system variable – turn it on.
- Exit the Settings dialog.
- (Optional) Select an entity or set of entities.
- Hold Shift, click and hold the middle mouse button, then move the cursor.
- If no entities are selected, the view will rotate around the entities currently displayed.
- If entities are selected, the view will rotate around the selected entity/entities.
5. MANIPULATOR
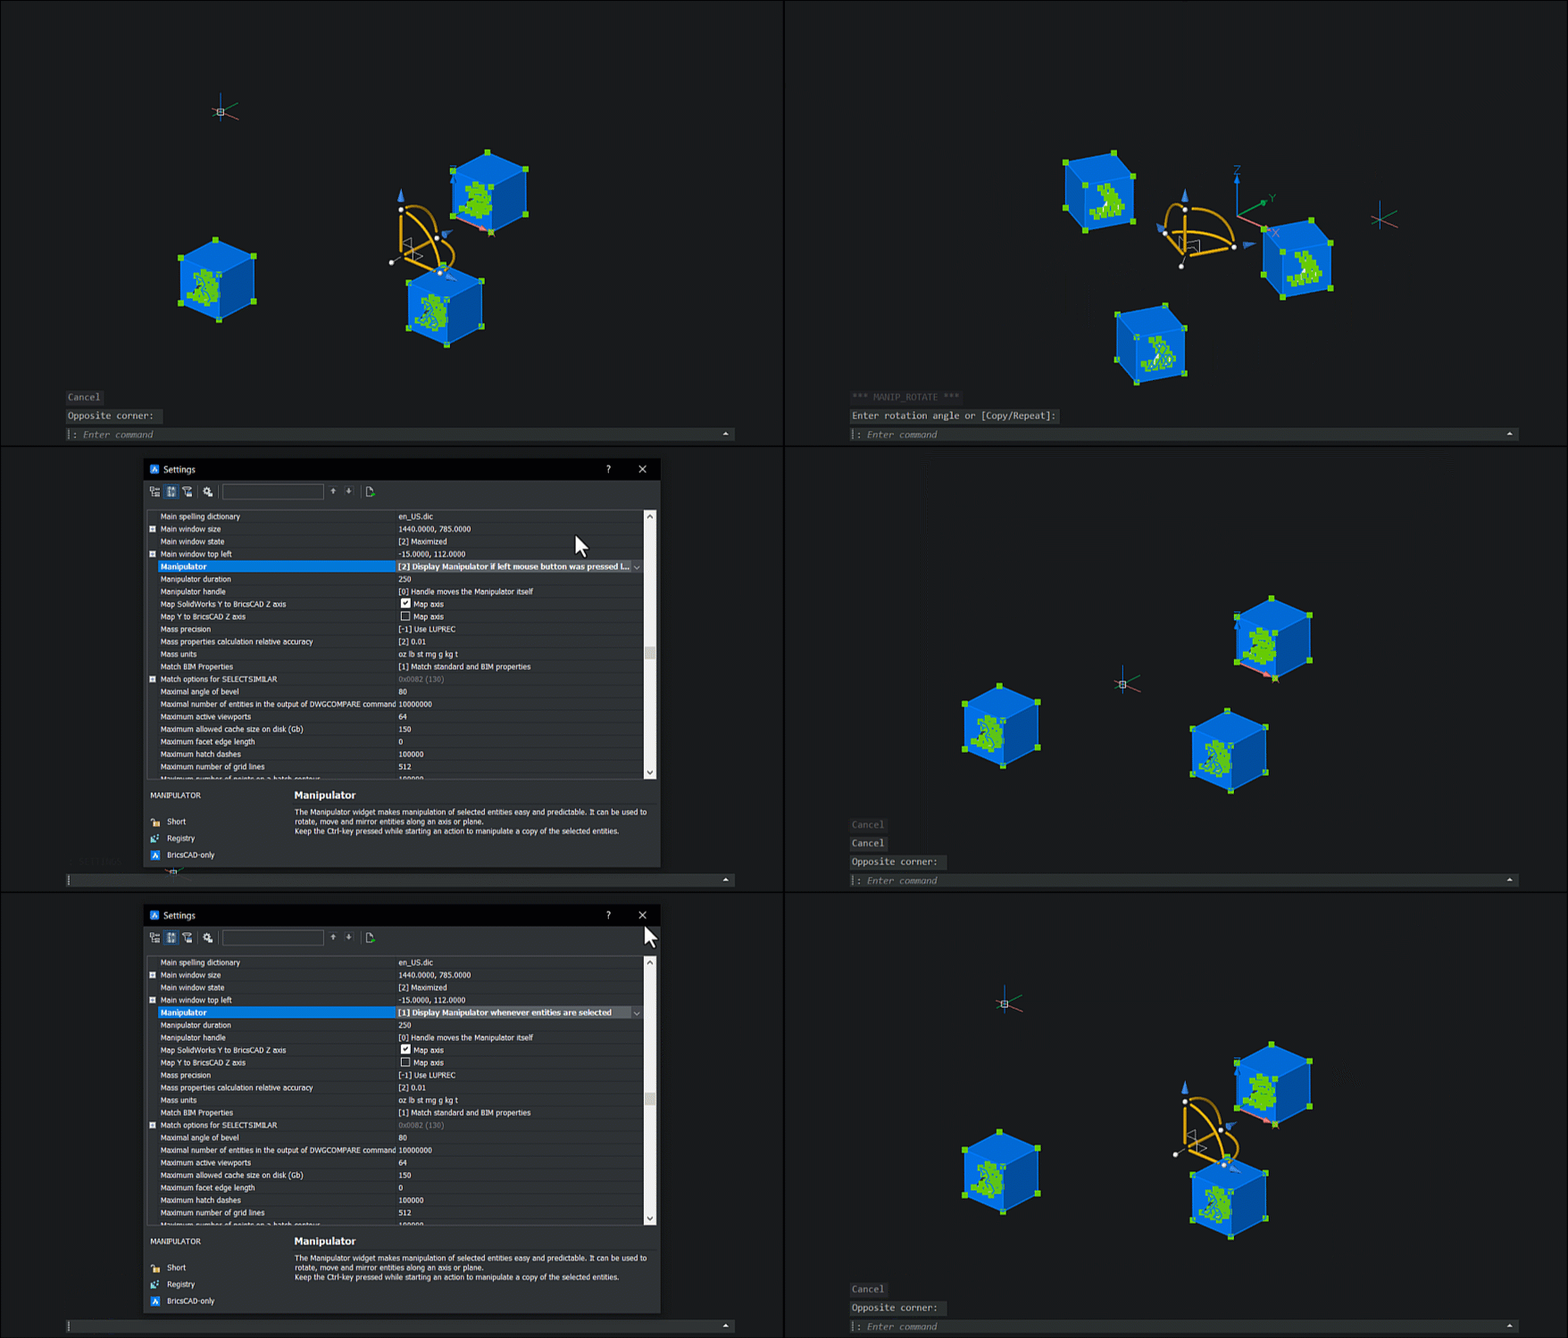
Set the Manipulator to appear whenever you select an entity. By default, the Manipulator appears if you have at least one entity selected and hold the left mouse button for an extended amount of time. Use the MANIPULATOR system variable to change this behavior.
So funktioniert das:
- In the Settings dialog, change the MANIPULATOR system variable to 1.
- Exit the Settings dialog.
- Select an entity or set of entities.
- The Manipulator will appear.
6. APERTURE
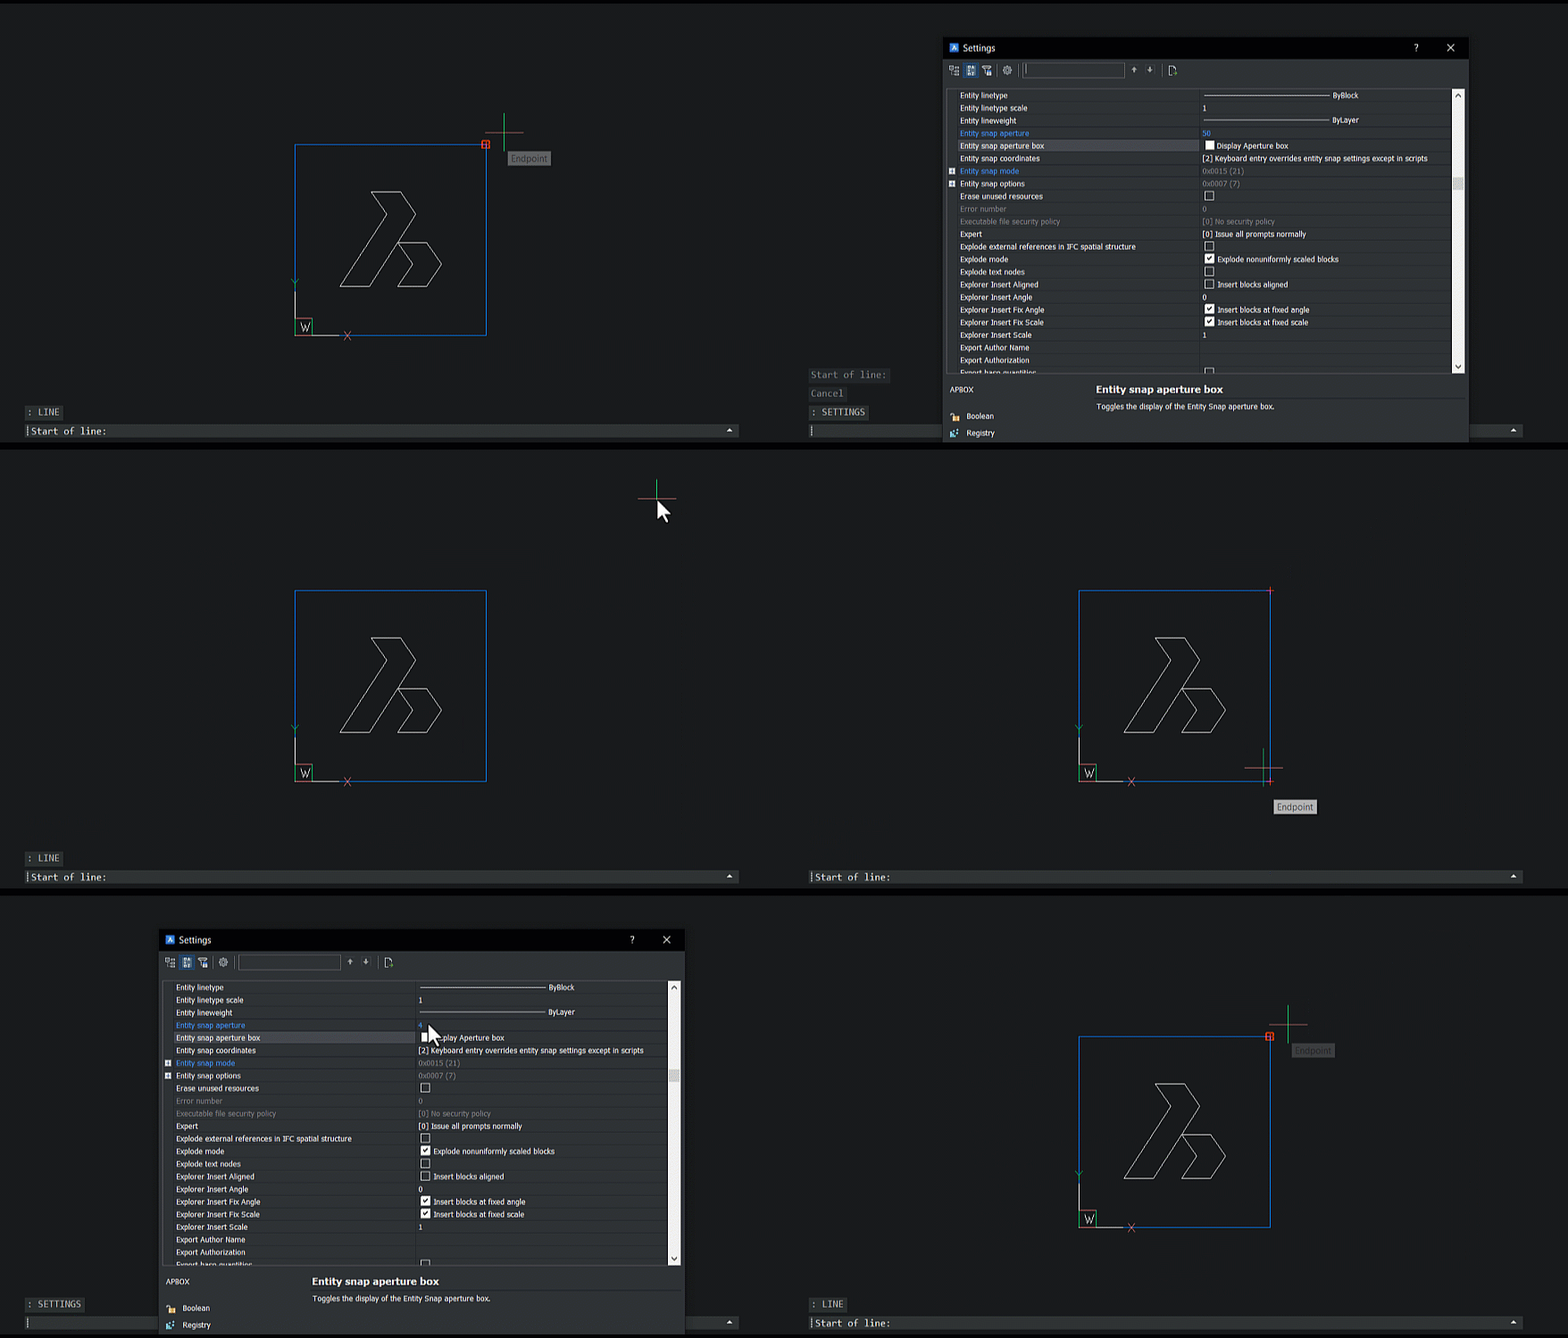
Tweak the sensitivity of snapping in BricsCAD. This setting can be extremely helpful if you find that the sensitivity is too high and BricsCAD is snapping to anything and everything, or your screen is very large and you want to move your mouse less.
So funktioniert das:
- In the Settings dialog, change the APERTURE system variable – the default is 10.
- Exit the Settings dialog.
- Start drawing as normal and see how the sensitivity works for you. It might take a few tries to get it to work exactly the way you want.
- (Optional) If you want to visualize the snap area turn on the Entity Snap Aperture Box - the APBOX system variable.
7. HIGHLIGHTEFFECT
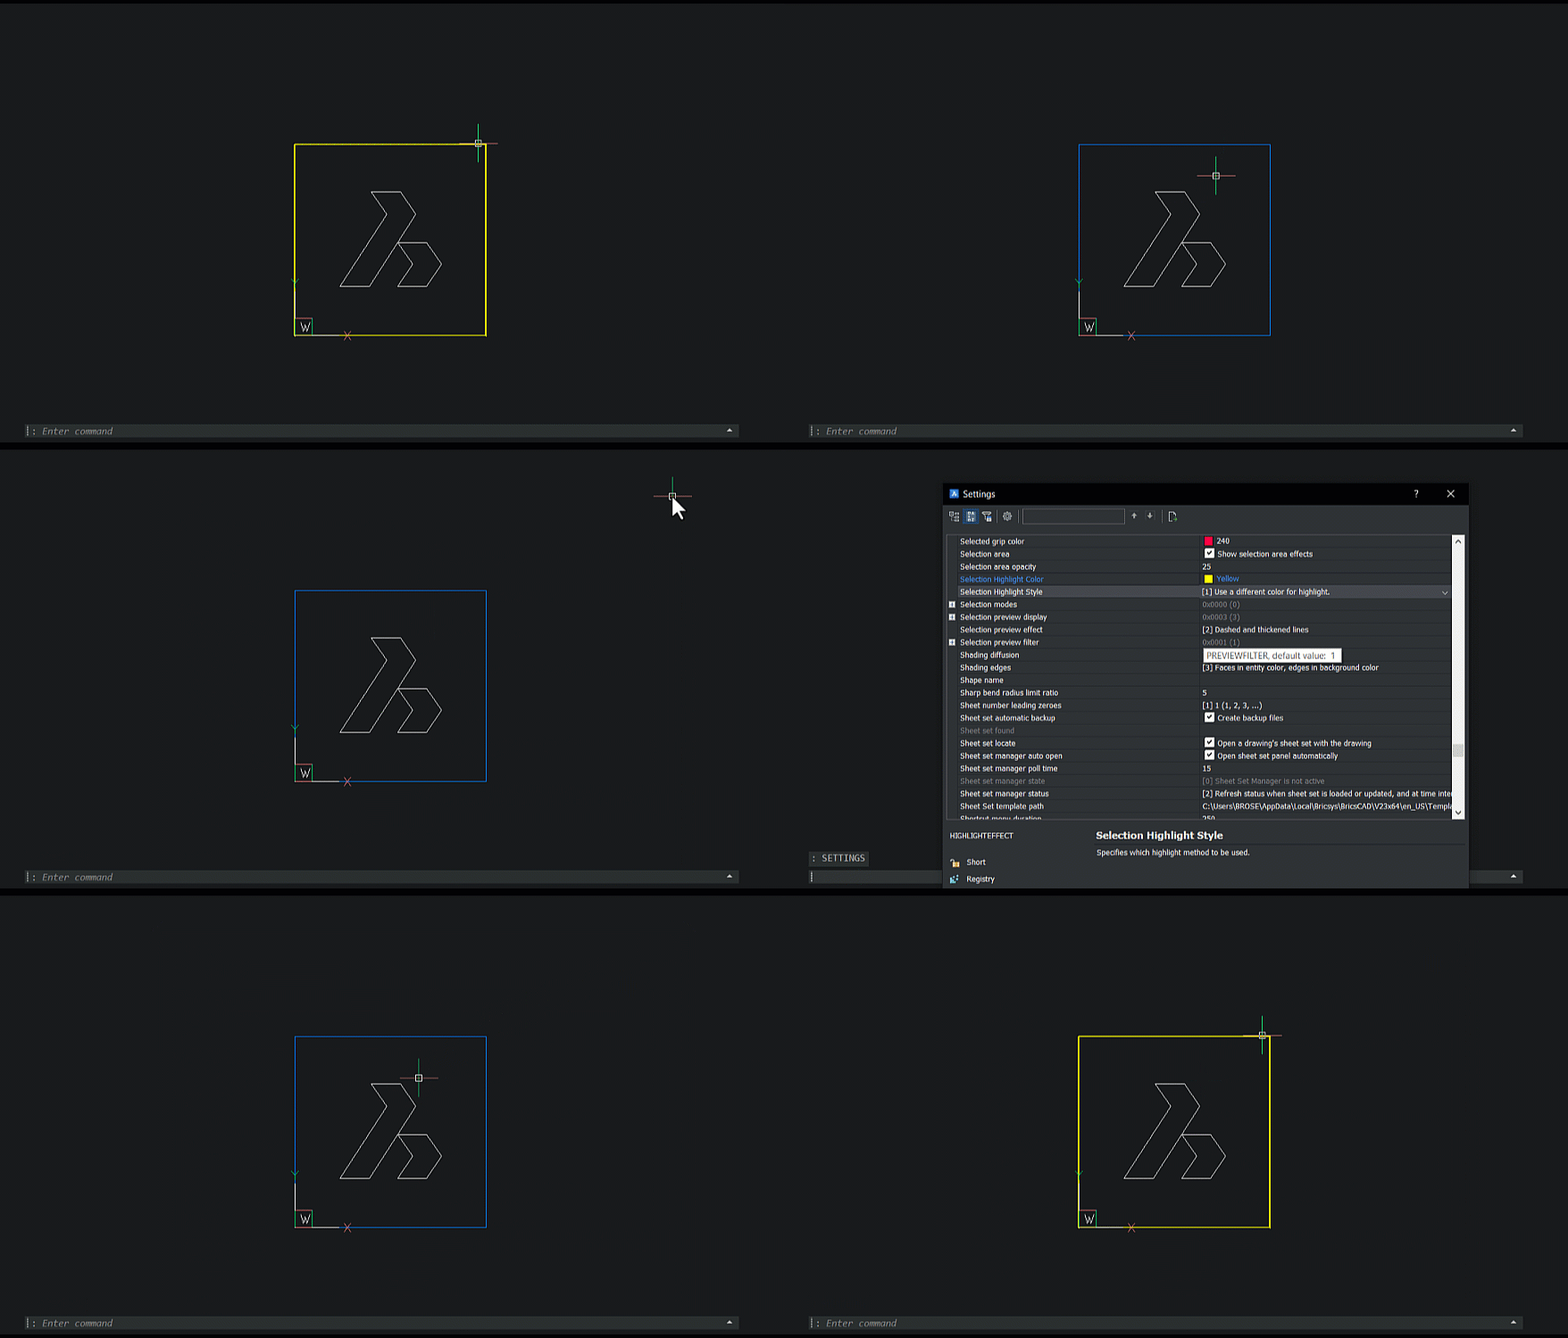
Change the way selected entities appear in BricsCAD. By default, selected 2D entities appear as a stippled “dotted” line. However, with the HIGHLIGHTEFFECT system variable, it is possible to change this behavior to a different color, a different thickness or both!
So funktioniert das:
- In the Settings dialog, change the HIGHLIGHTEFFECT system variable.
- (Optional) Change the color of the highlight – use the HIGHLIGHTCOLOR system variable.
- Exit the Settings dialog.
- Hover over an entity.
8. USENEWRIBBON
In V23 there is a new, Beta ribbon (the area at the top of the workspace that shows tools and commands). You can access it with the USENEWRIBBON variable. This will be the default for V24, so we’d love you to test it out and let us know what you think.
So funktioniert das:
- In the Settings dialog, check the USENEWRIBBON system variable – turn it on.
- Exit the Settings dialog.
- Restart BricsCAD.
- Test out the Ribbon and let us know what you think via a support request.
9. CMDLNTEXT
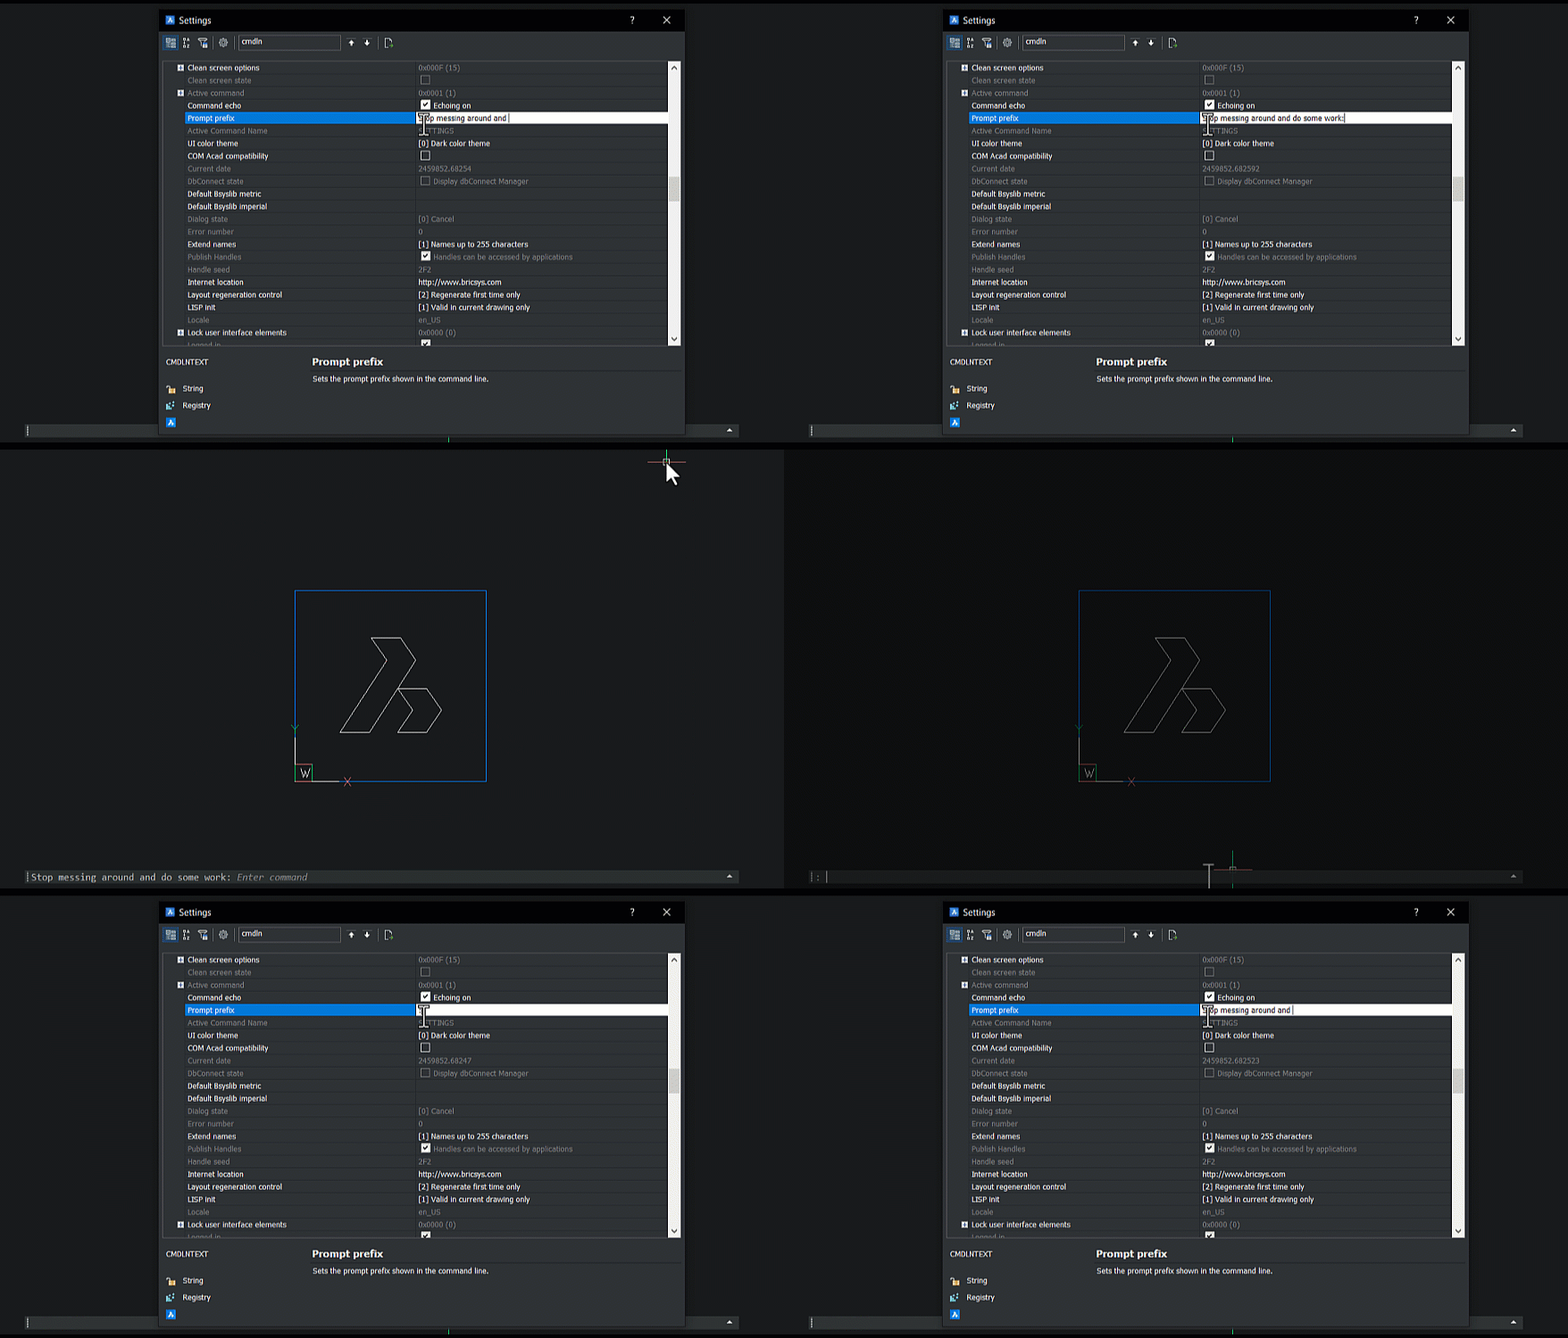
Want to prank a colleague that just left their workspace unattended? Then this is the system variable for you! By default, BricsCAD’s command line displays a simple “:”, but with the CMDLNTEXT system variable, it is possible to change this to anything you like…
So funktioniert das:
- In the Settings dialog, change the CMDLNTEXT system variable – we’ll leave this up to your imagination.
- Exit the Settings dialog.
- Your text should now display in the Command line.
10. Review Your Custom Settings
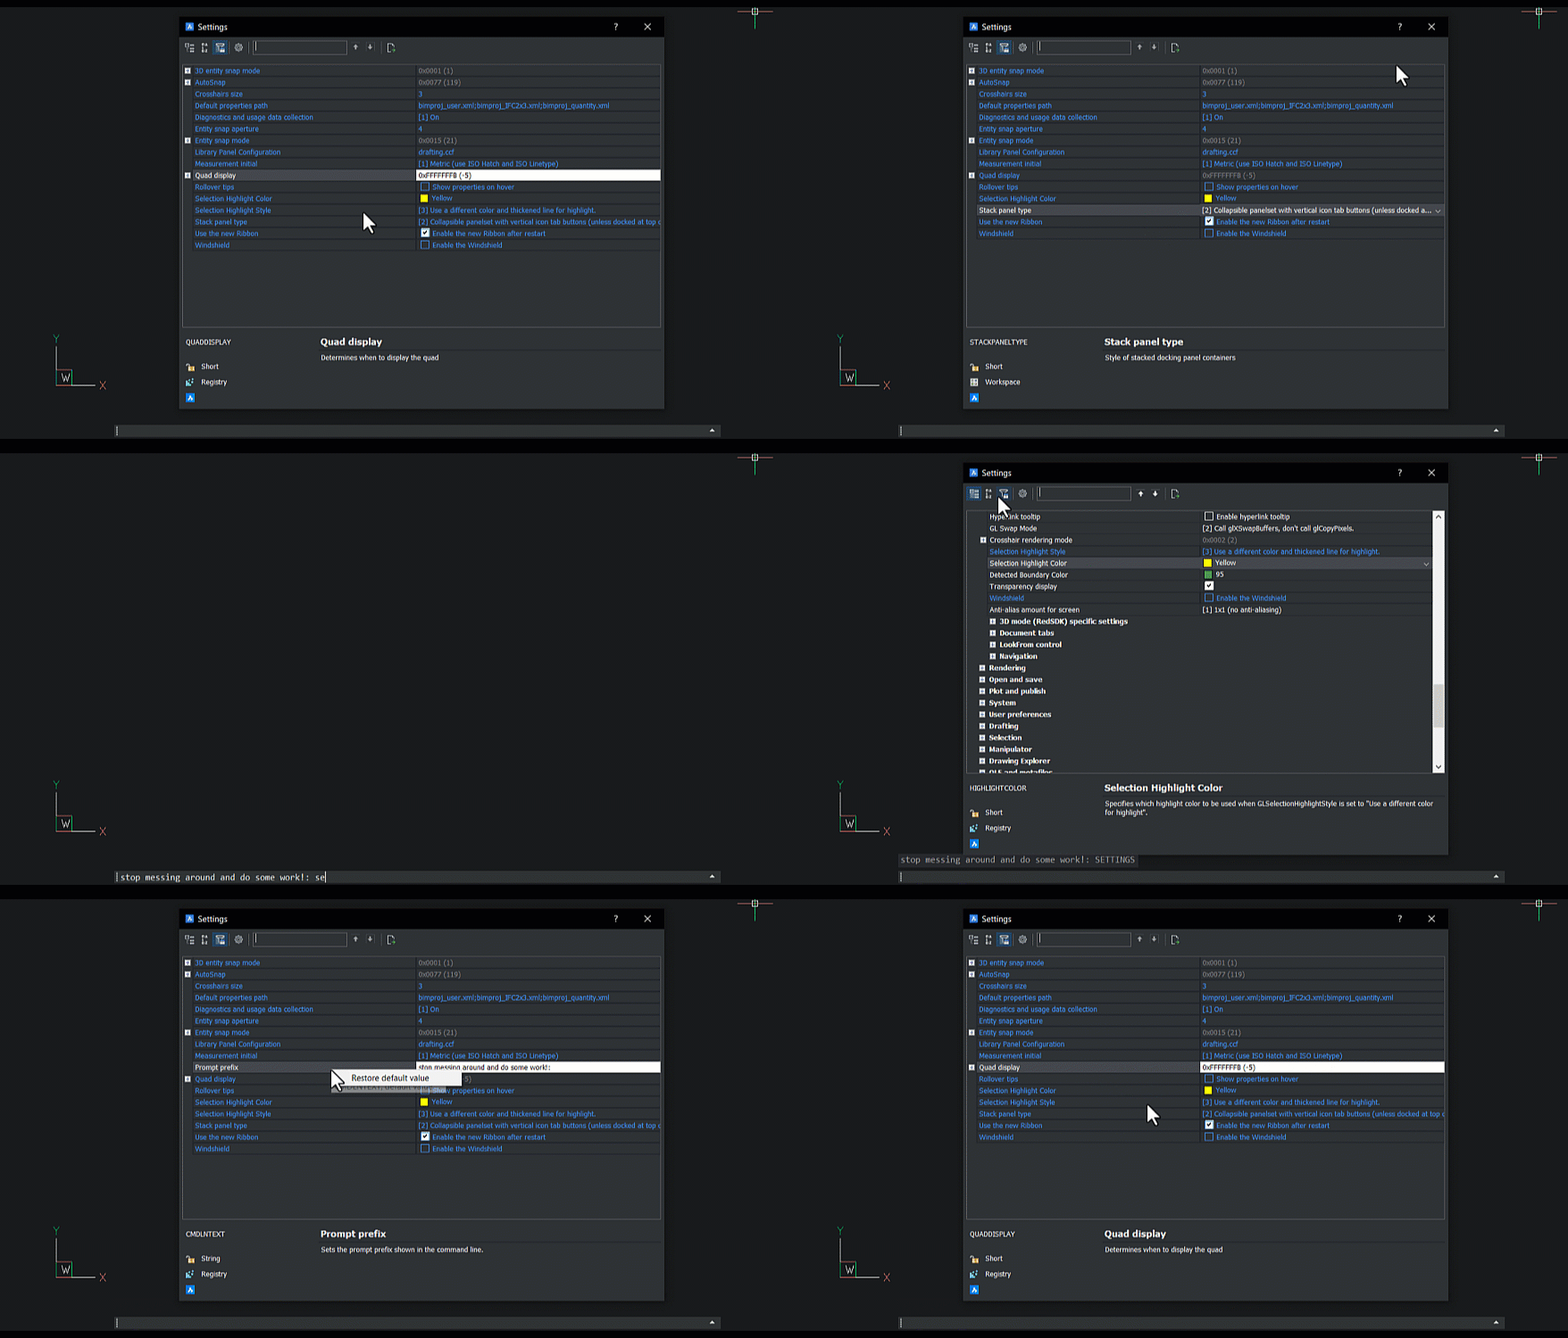
After all this fun, you might have gotten a bit confused about what you’ve changed, or just want to go back to how things were before. Luckily, there is a section in the Settings dialog that allows you to see all the customized settings.
To access this:
- Open the Settings dialog (SETTINGS).
- In the top-left corner, click the Show differences option – the third icon.
- All customized settings will be displayed.
To revert to a setting:
- Open the Settings dialog (SETTINGS).
- Right-click the setting.
- Select Restore default value.
Want more BricsCAD tips and tricks?
If you’re curious about what else you can do in BricsCAD, check out our YouTube channel where you can learn more about BricsCAD’s features and commands, or take a peek at the rest of the Bricsys blog.
